
How to Control a Wanderer Astro Flat Panel with ASIAIR or StellaVita
Taking flat frames has never been the fun part of astrophotography, but Wanderer Astro has made it a lot less annoying. Compatible WandererCover models can now be controlled by the ZWO ASIAIR Plus and ToupTek StellaVita — and any other controller with a switchable DC output — letting you operate the panel directly from your imaging setup without touching it.
The supported models are the WandererCover V4-EC, V4-EC IR, V4 Pro-EC, and Wanderer Eclipse.
What You Need
A note on names: the panels are sold here as the Wanderer Electric Flatbed V4 PRO EC, in sizes from 100mm to 380mm. If you are searching our store for “WandererCover” you will not find it — that is the manufacturer’s family name for the same product line.
First, make sure your WandererCover is running firmware version 20250404 or later — that's the minimum for ASIAIR and StellaVita support. Update through WandererEmpire if needed.
Your controller also needs to be able to switch its DC output ports on and off. The ASIAIR Plus does this; the ASIAIR Mini does not, so it won't work here.
Any controller with a switchable DC output will work. We have seen this done with the ASIAIR Plus, the ToupTek StellaVita and the StellarMate Pro — the ASIAIR Mini is the one exception, because it has no controllable DC output.
How It Works
Connect the WandererCover's DC input to a controllable DC output on the ASIAIR Plus or StellaVita, then connect the PC port to a USB port on the controller. That's the physical setup.
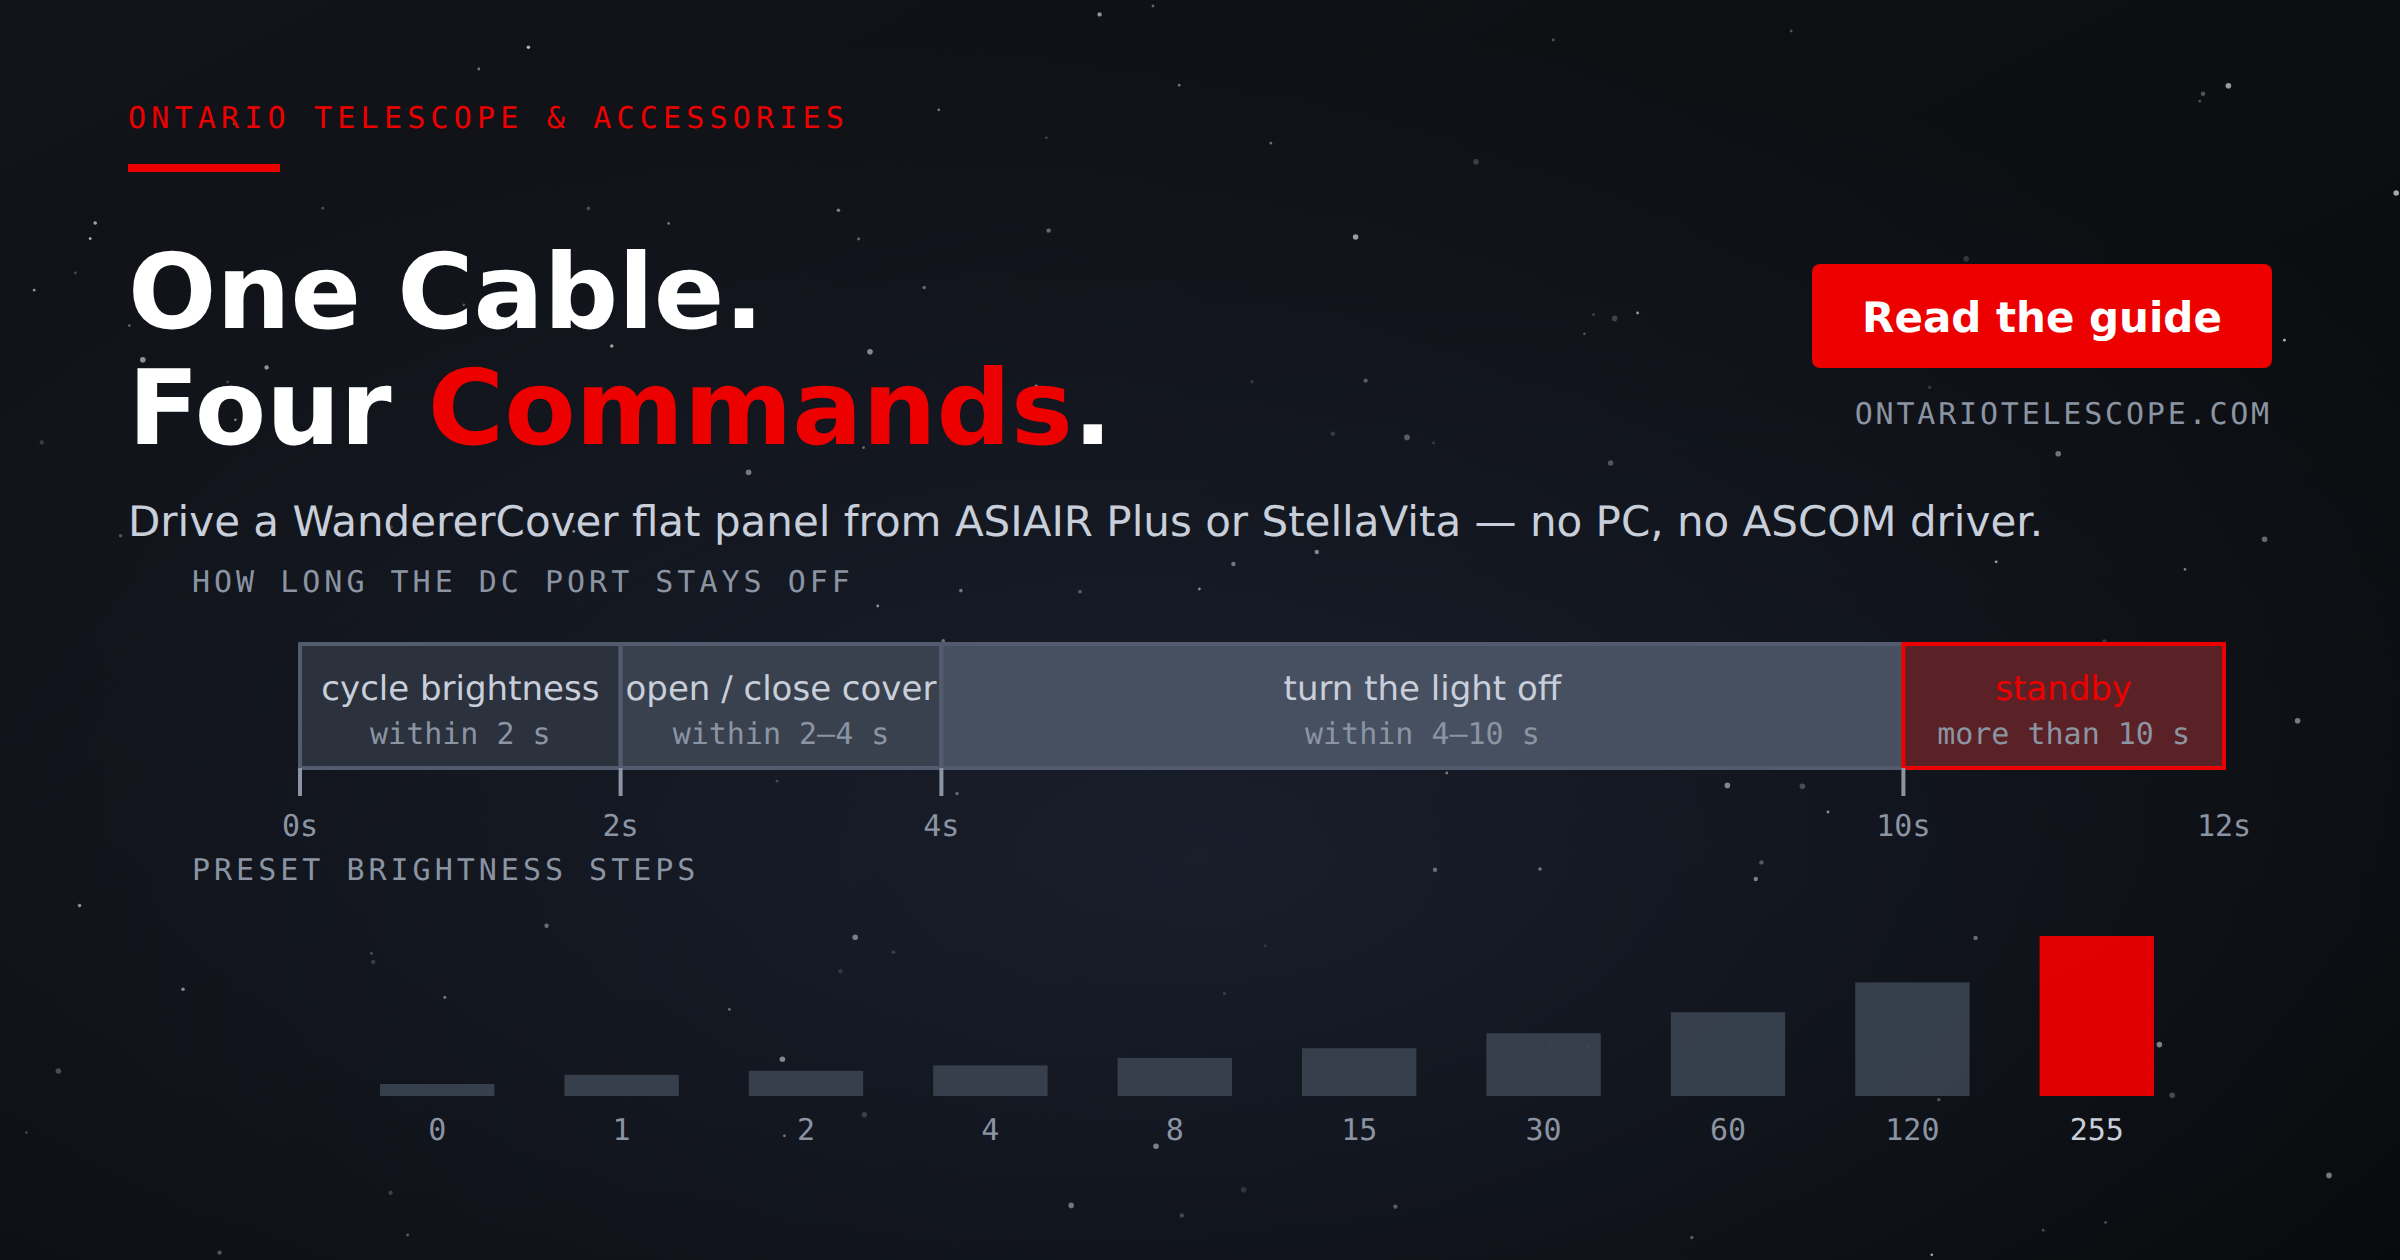
The control method itself is simple but worth understanding: the controller doesn't talk to the panel the way an ASCOM driver would. It communicates by briefly cutting and restoring DC power in specific timing patterns. After the DC port has been on for more than 10 seconds, the WandererCover enters standby and starts listening for those patterns.
What You Can Control
- Open/close the cover — cut power and restore it within 2–4 seconds. The panel opens or closes based on its current position and whatever angles you've set in WandererEmpire.
- Cycle brightness — cut and restore within 2 seconds to step through preset levels: 0, 1, 2, 4, 8, 15, 30, 60, 120, 255.
- Turn the light off — cut and restore within 4–10 seconds to set brightness to zero.
WandererEmpire 2.2.2 and later also lets you save custom brightness values that can be recalled the same way.
Limitations
ASIAIR Mini won't work — no controllable DC output.
Cover positions need to be configured in WandererEmpire ahead of time. The controller triggers the movement; it doesn't set the angles.
This isn't full ASCOM control. You get preset brightness cycling rather than direct 0–255 adjustment, and dew heater control isn't part of this method at all — for that you'll still need a NINA/ASCOM workflow using the "Device Actions and Commands" plugin.
Bottom Line
For ASIAIR Plus and StellaVita users, especially on portable rigs, this is a solid improvement. Get the firmware updated, configure your angles once in WandererEmpire, and your DC output handles the rest — cover movement, panel brightness, end-of-night flats. Not a full PC replacement, but for most setups it's exactly enough.
What you need to buy
- Wanderer Electric Flatbed V4 PRO EC 100mm — for small refractors
- Wanderer Electric Flatbed V4 PRO EC 150mm — the common size for 80 to 100mm apos
- WandererBox Lite V3 — powers the panel and the rest of the rig from one 12V feed
- Wanderer Astro White Dwarf manual flat panel — if you would rather not motorise it