Product Overview
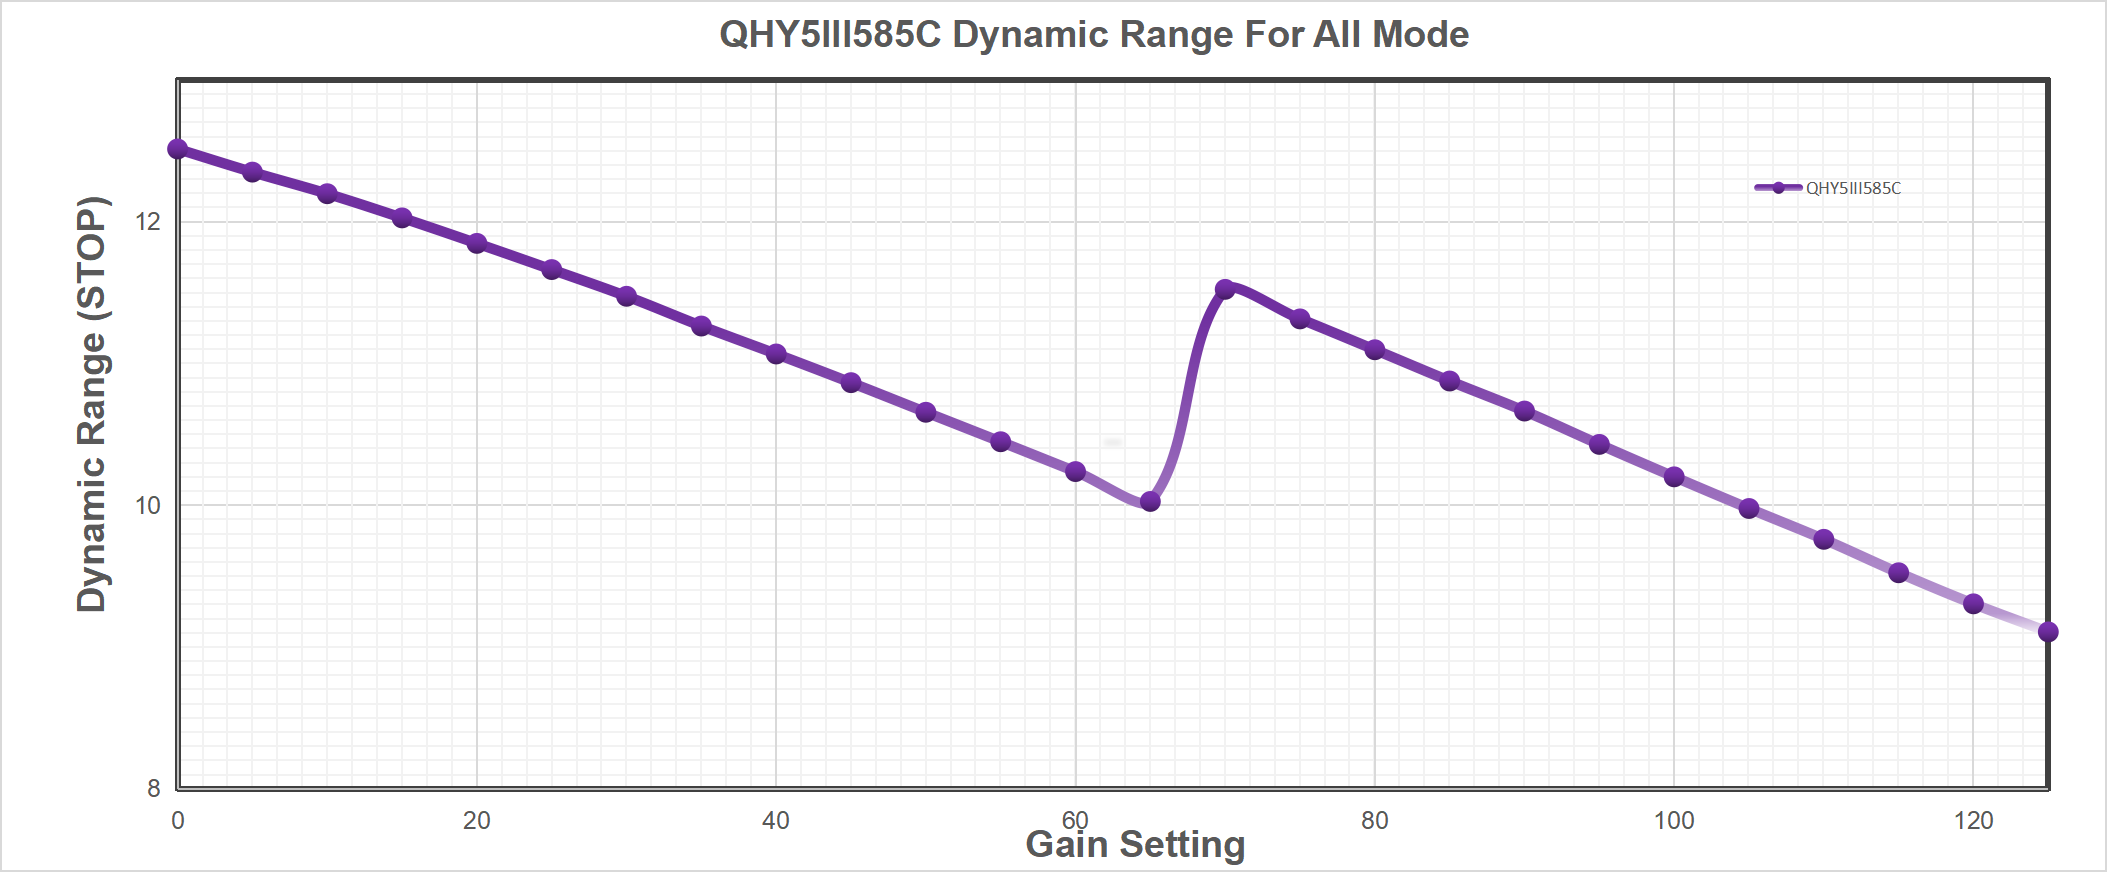
QHY5III585C is a new generation of QHY5III V2 series planetary guide camera, which is an enhanced version of its predecessor QHY5III485C. It has a high sensitivity in the near infrared similar to that of 5III462C, while the dynamic range performance has been greatly improved. It has a 1/1.2-inch large sensor and excellent characteristics of zero glow.
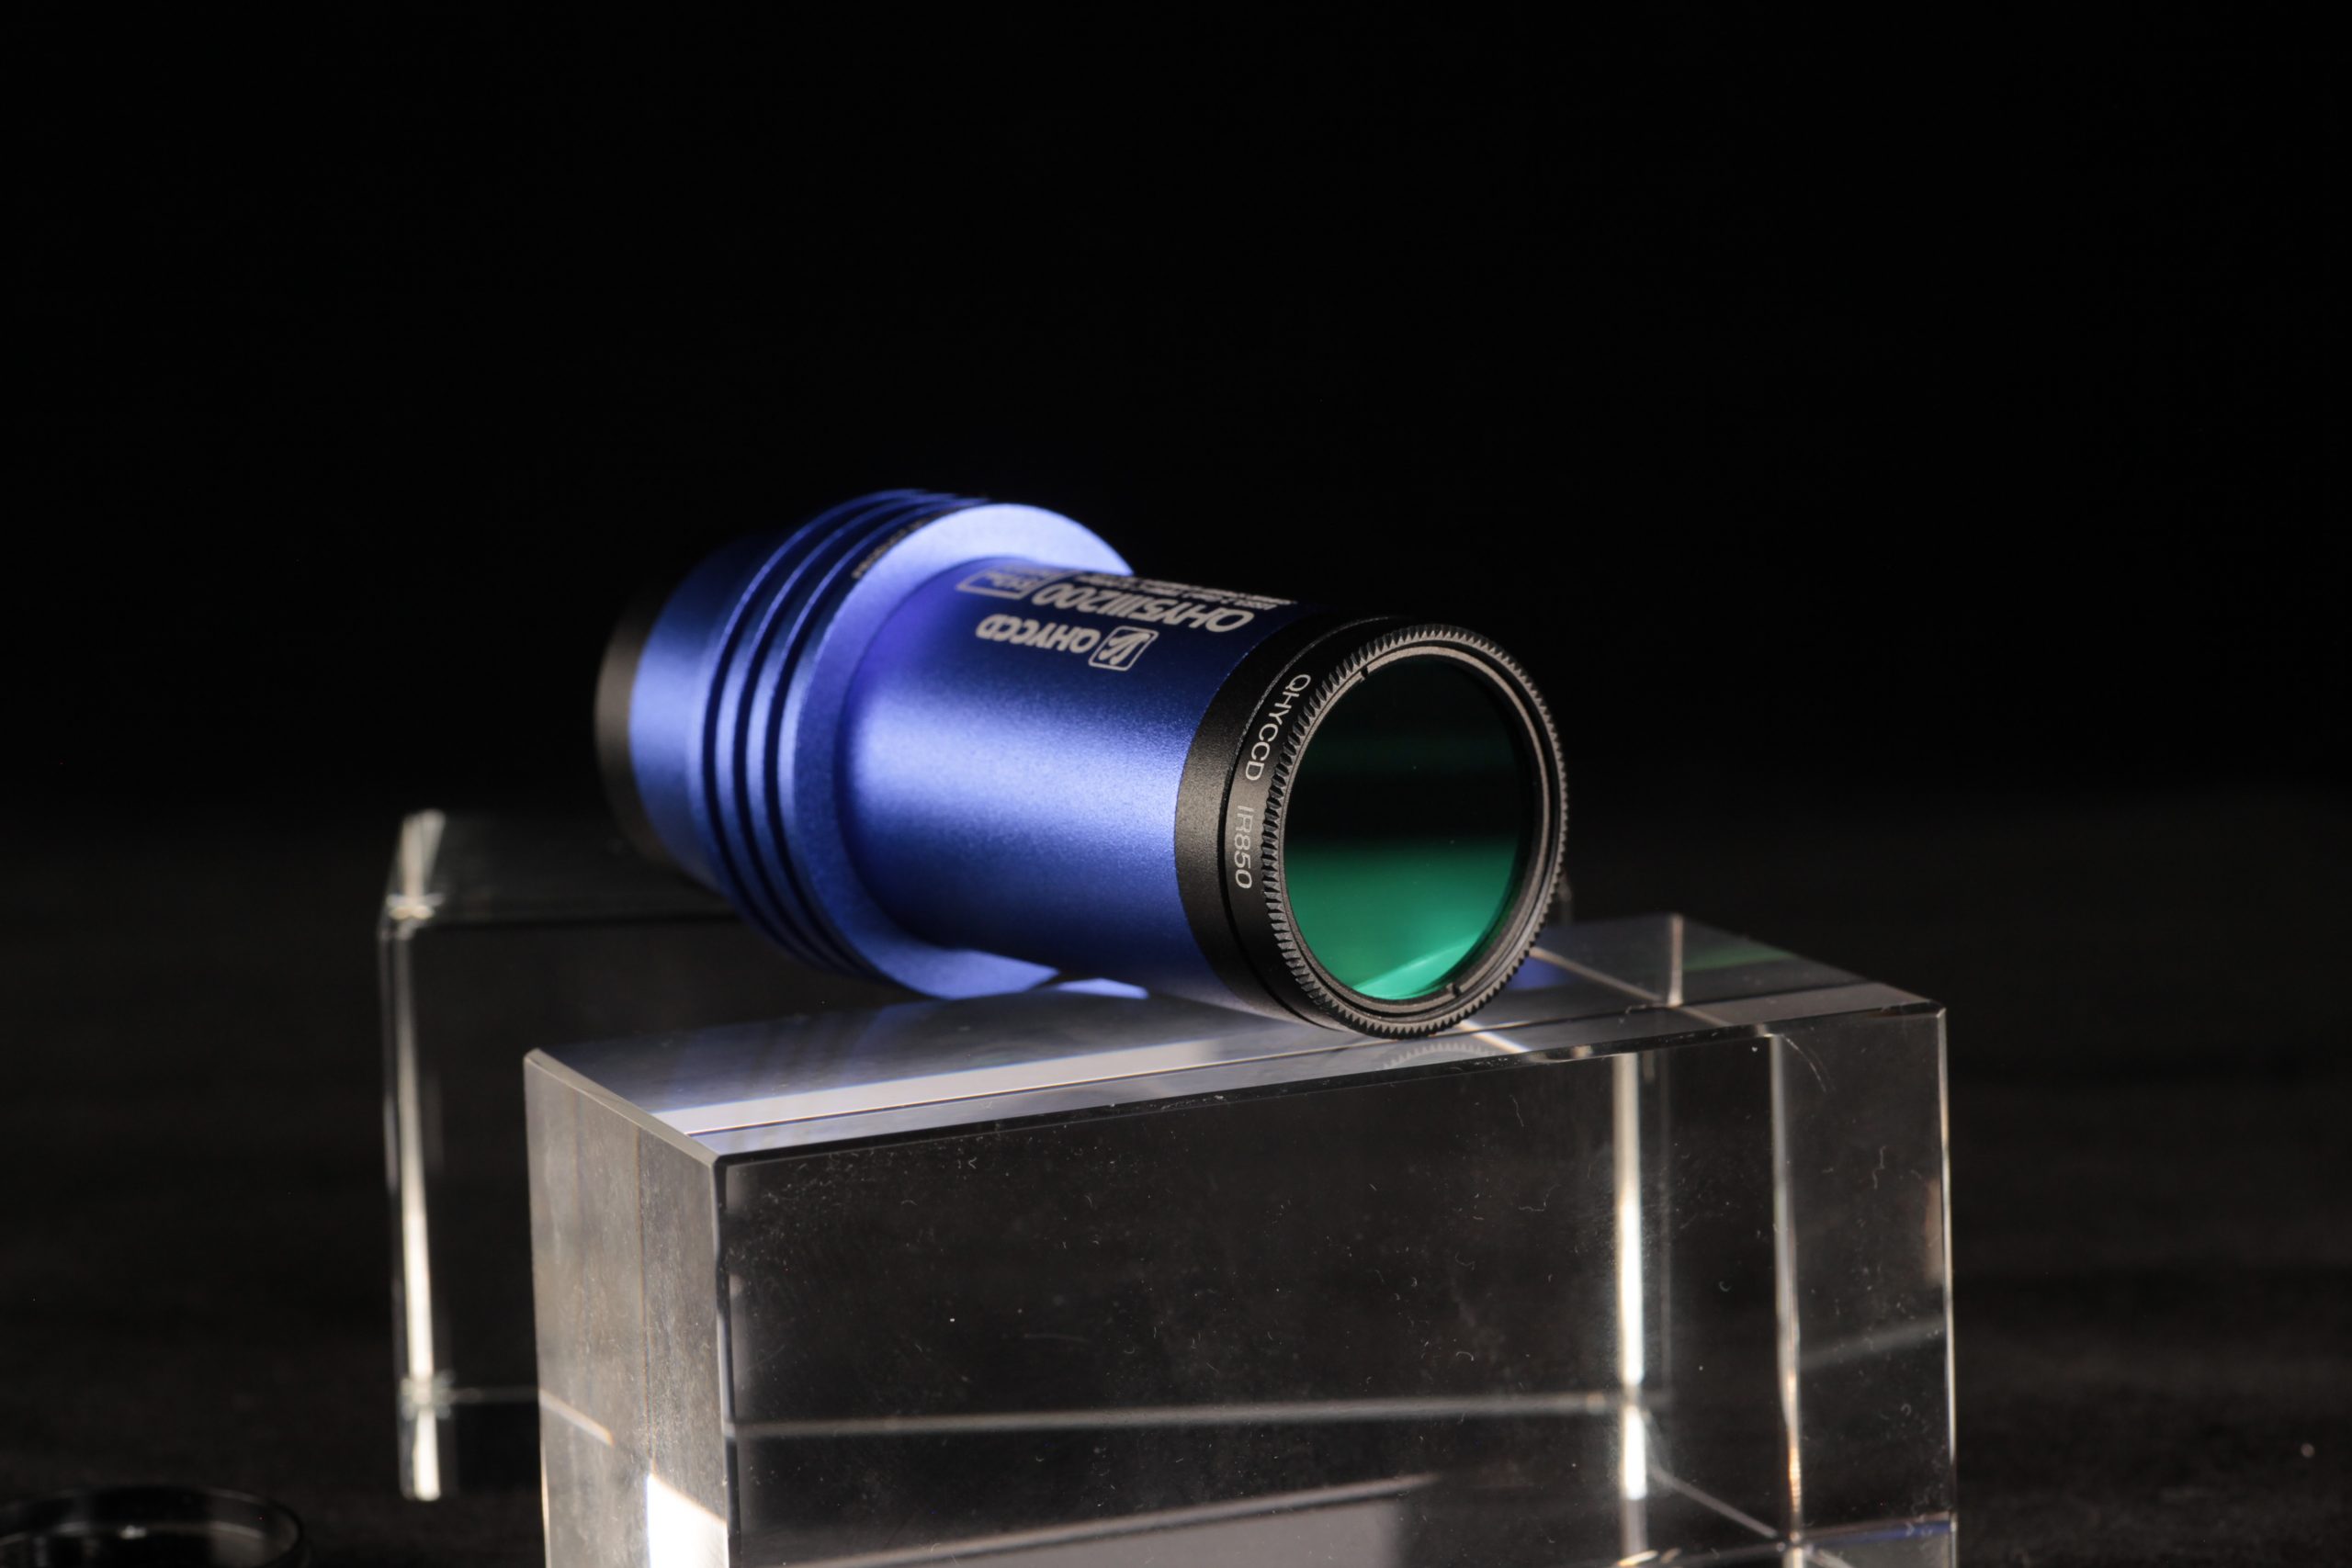
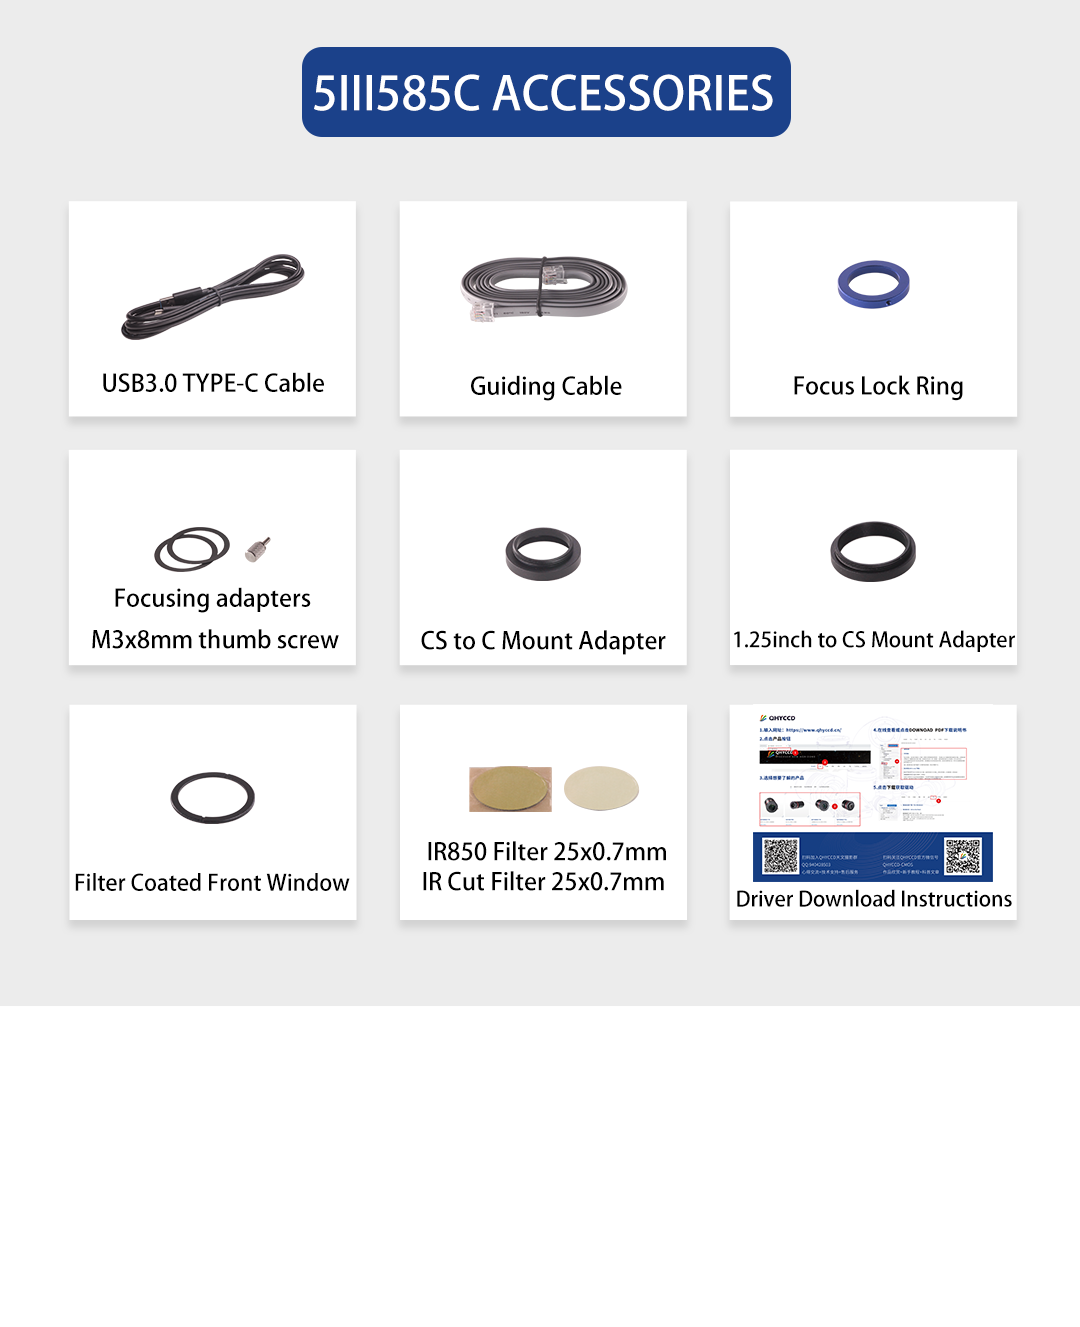
The product comes with filters including an IR850nm filter.
In this latest generation of sensors, the photodiode portion of the pixel well is physically deeper than in previous sensors, allowing photons of longer wavelengths to penetrate deeper into the substrate. This dramatically increases the sensor’s sensitivity to red and near-infrared (NIR) light. The sensor displays almost equal peak sensitivity to NIR light as it does to light in the visible spectrum.
 One benefit of the back-illuminated CMOS structure is improved sensitivity. In a typical front-illuminated sensor, photons from the target entering the photosensitive layer of the sensor must first pass through the metal wiring that is embedded just above the photosensitive layer. The wiring structure reflects some of the photons and reduces the efficiency of the sensor.
In the back- illuminated sensor the light is allowed to enter the photosensitive surface from the reverse side. In this case the sensor’s embedded wiring structure is below the photosensitive layer. As a result, more incoming photons strike the photosensitive layer and more electrons are generated and captured in the pixel well. This ratio of photon to electron production is called quantum efficiency. The higher the quantum efficiency the more efficient the sensor is at converting photons to electrons and hence the more sensitive the sensor is to capturing an image of something dim.
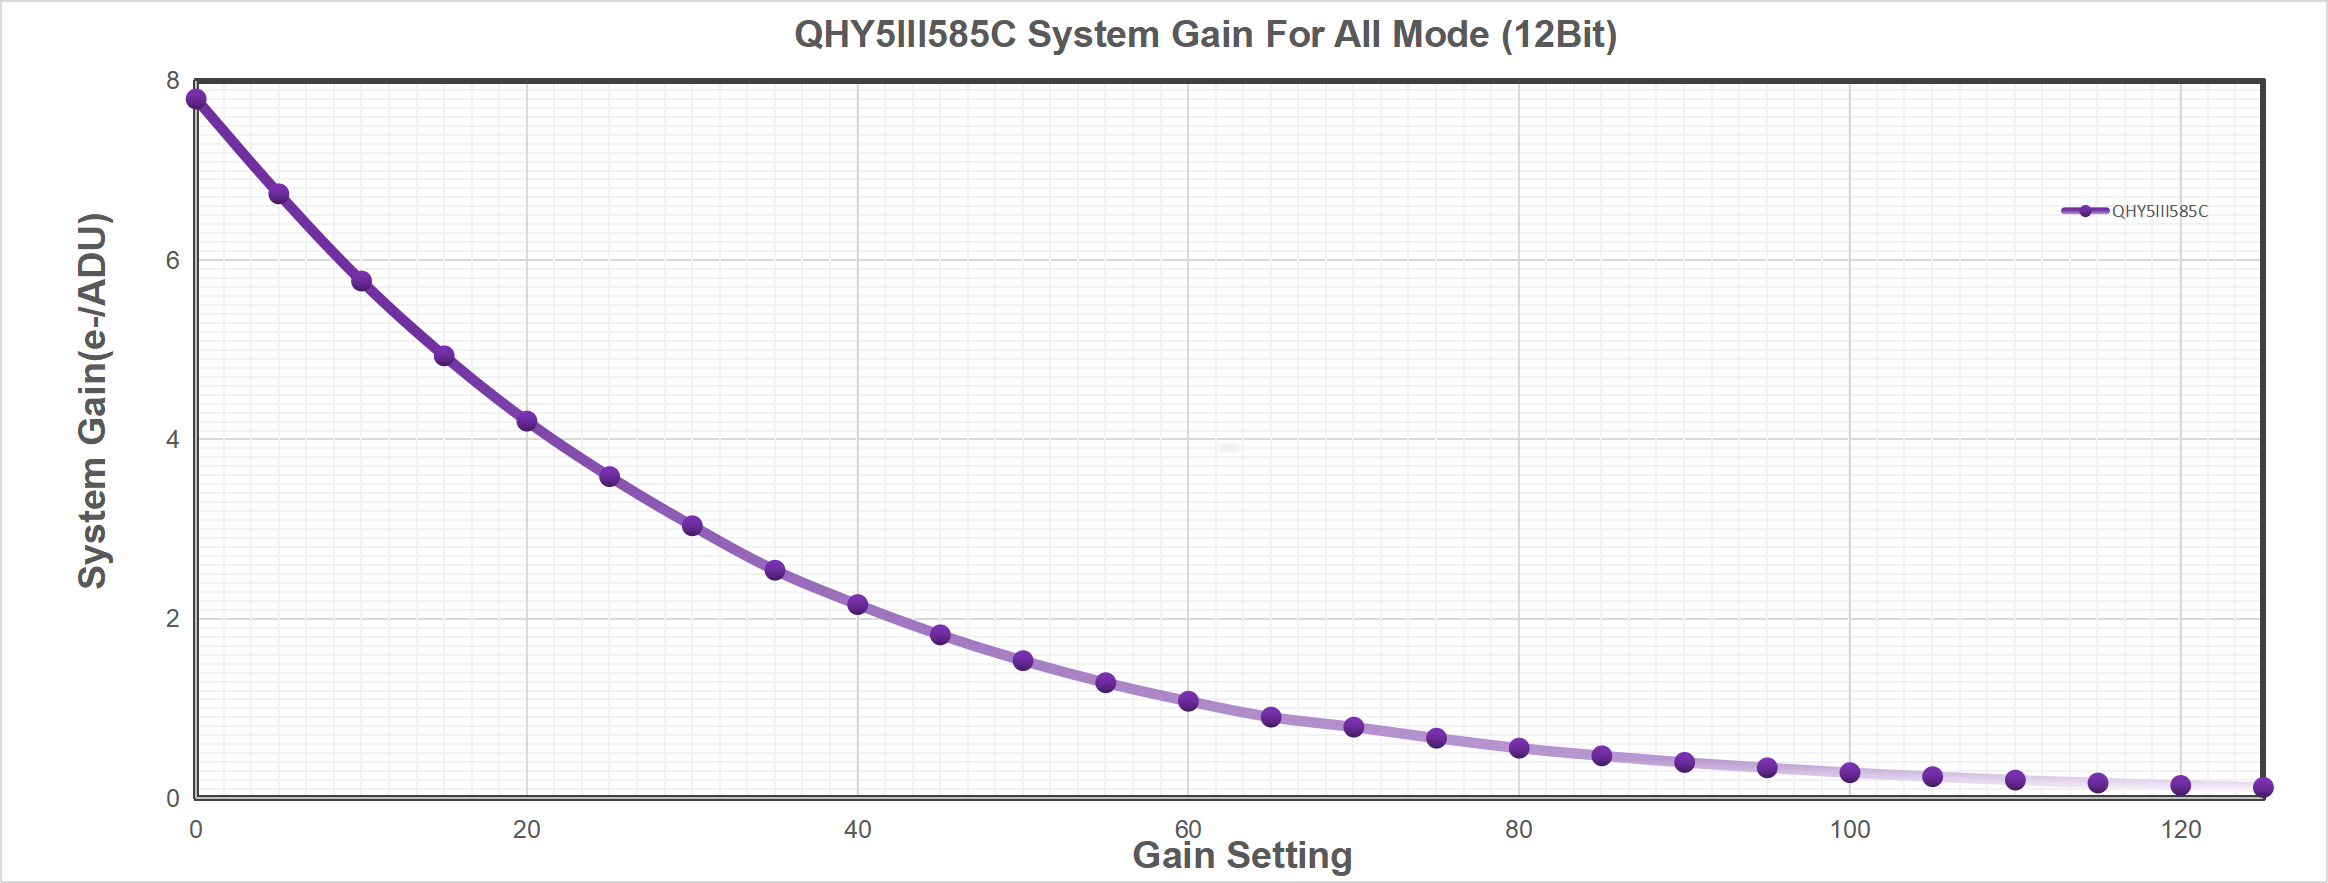
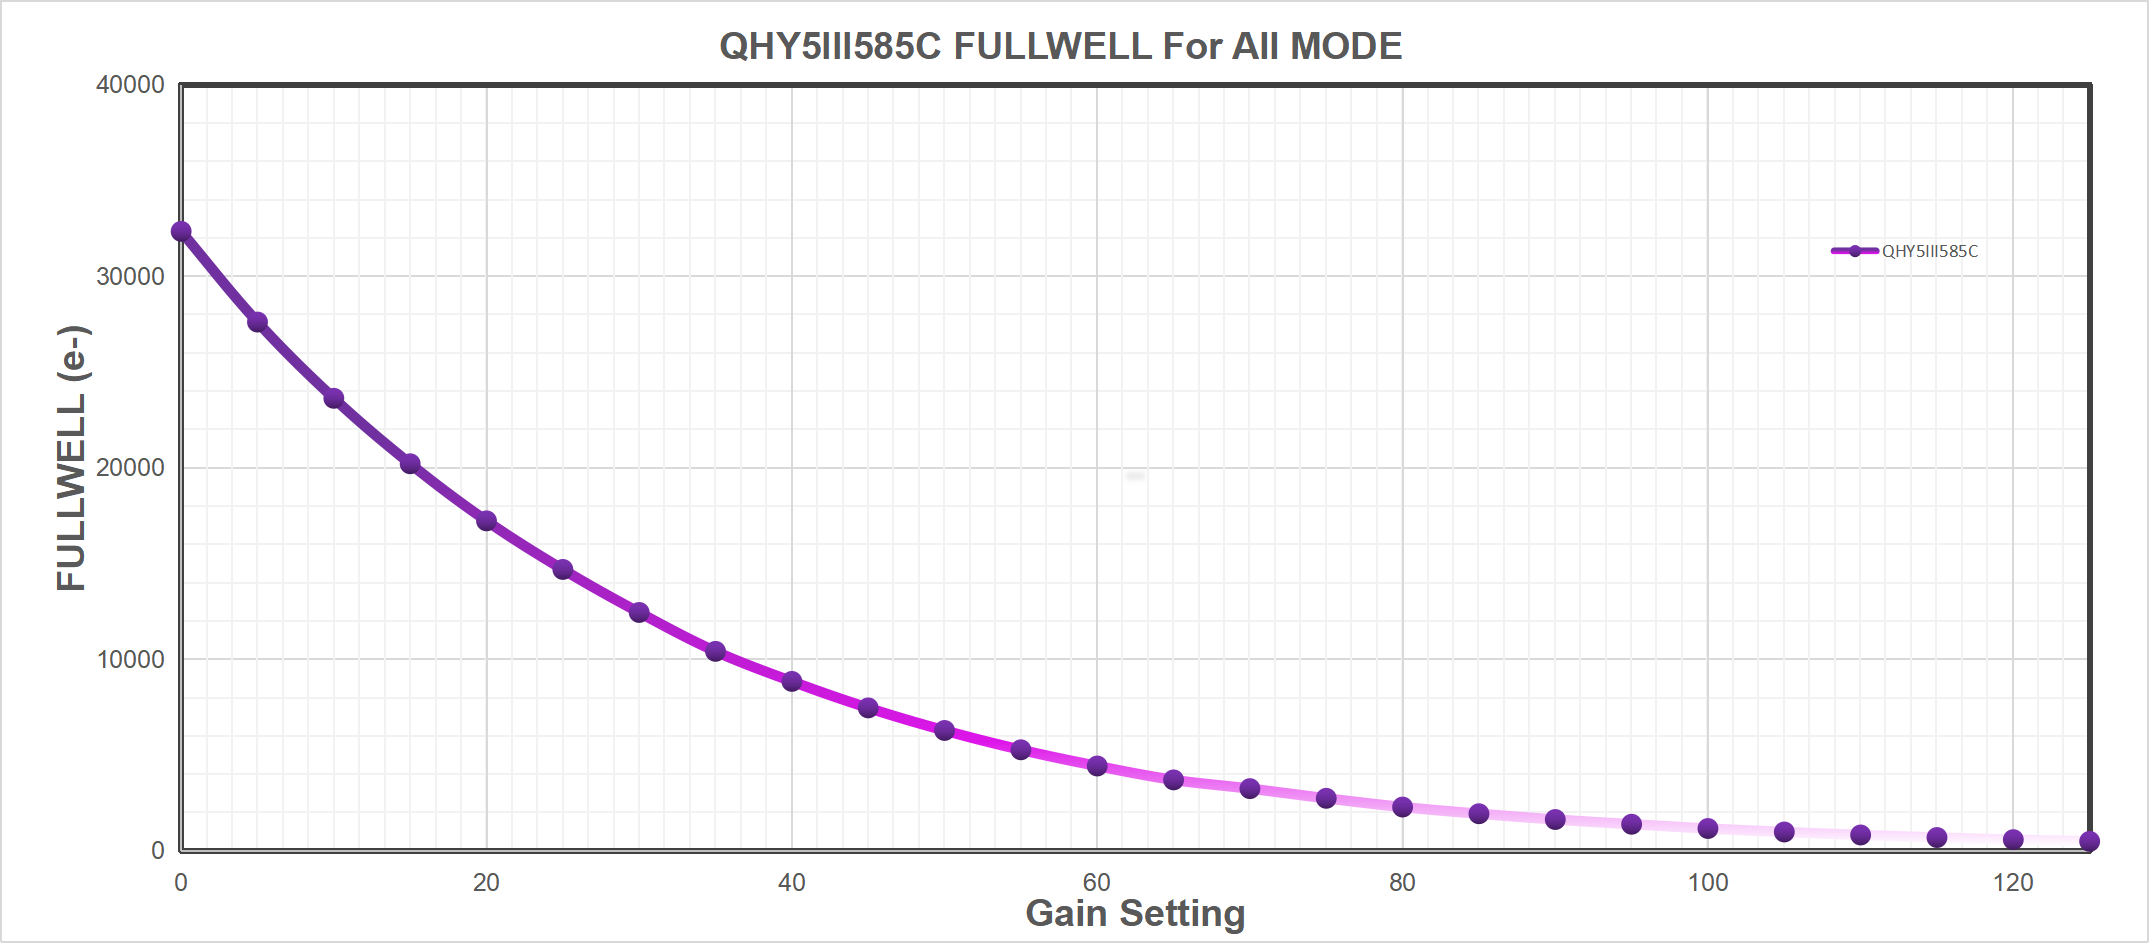
The IMX585 is a Sony Starvis II processor that enables high sensitivity and high dynamic range (HDR). It also improves sensitivity in the near-infrared range by approximately 1.7 times* compared to the IMX485. The new camera QHY5III585C has a large fullwell capacity of over 30ke-, approximately three times that of the previous generation QHY5III485C.
*This data is officially provided by Sony: https://www.sony-semicon.com/cn/news/2021/2021062901.html
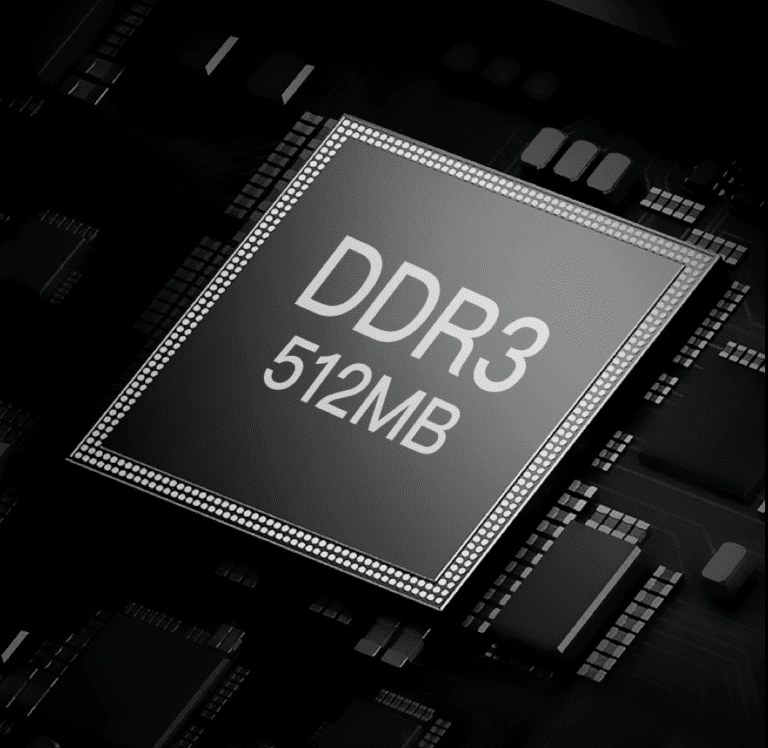
The QHY5III (Ver. 2) series planetary and guiding cameras are all equipped with a 512MB DDR3 image buffer which can effectively reduce the pressure on computer transmission, a great help for planetary photography which often requires writing a large amount of data in a short period of time. Some deep-sky astrophotography cameras on the market today only have 256MB, for example.
In comparison, the 512MB DDR3 memory of the new 5III (Ver. 2) series cameras represents a significant upgrade.
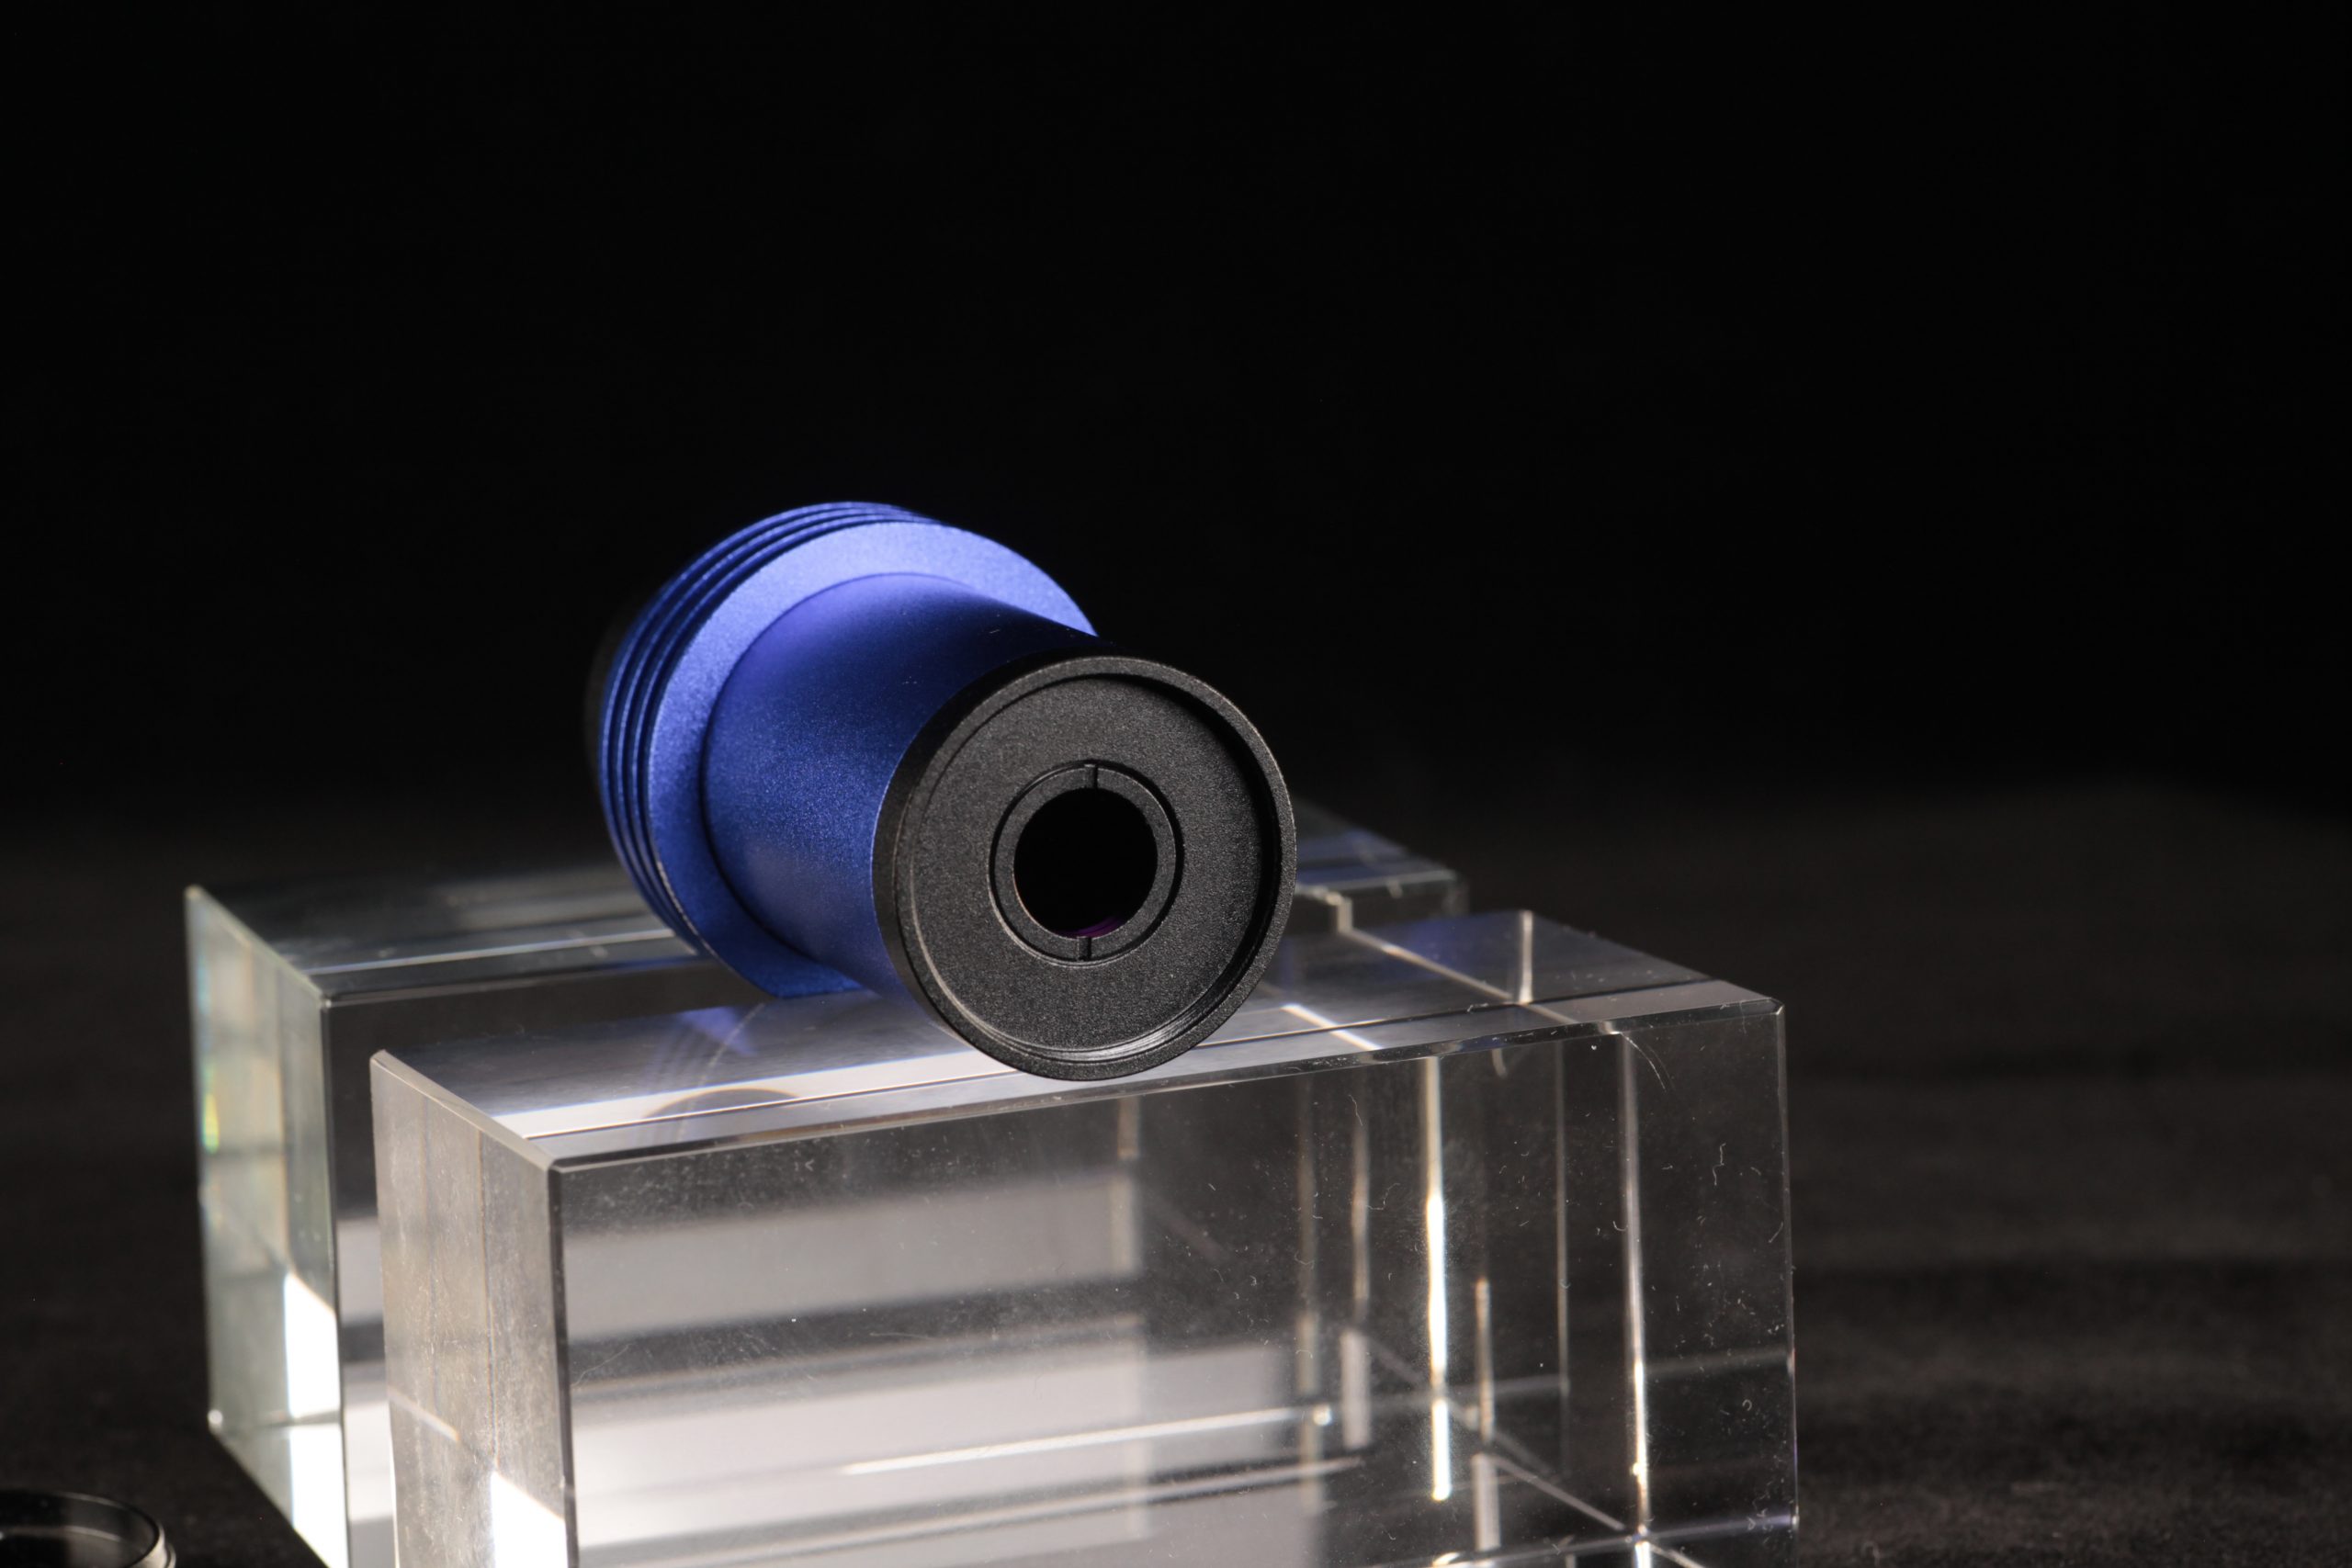
QHY5III (Ver. 2) series cameras have adopted a new front-end design with better compatibility.Here we only take QHY5III200M as example, however, ALL V2 cams in the future share these features.
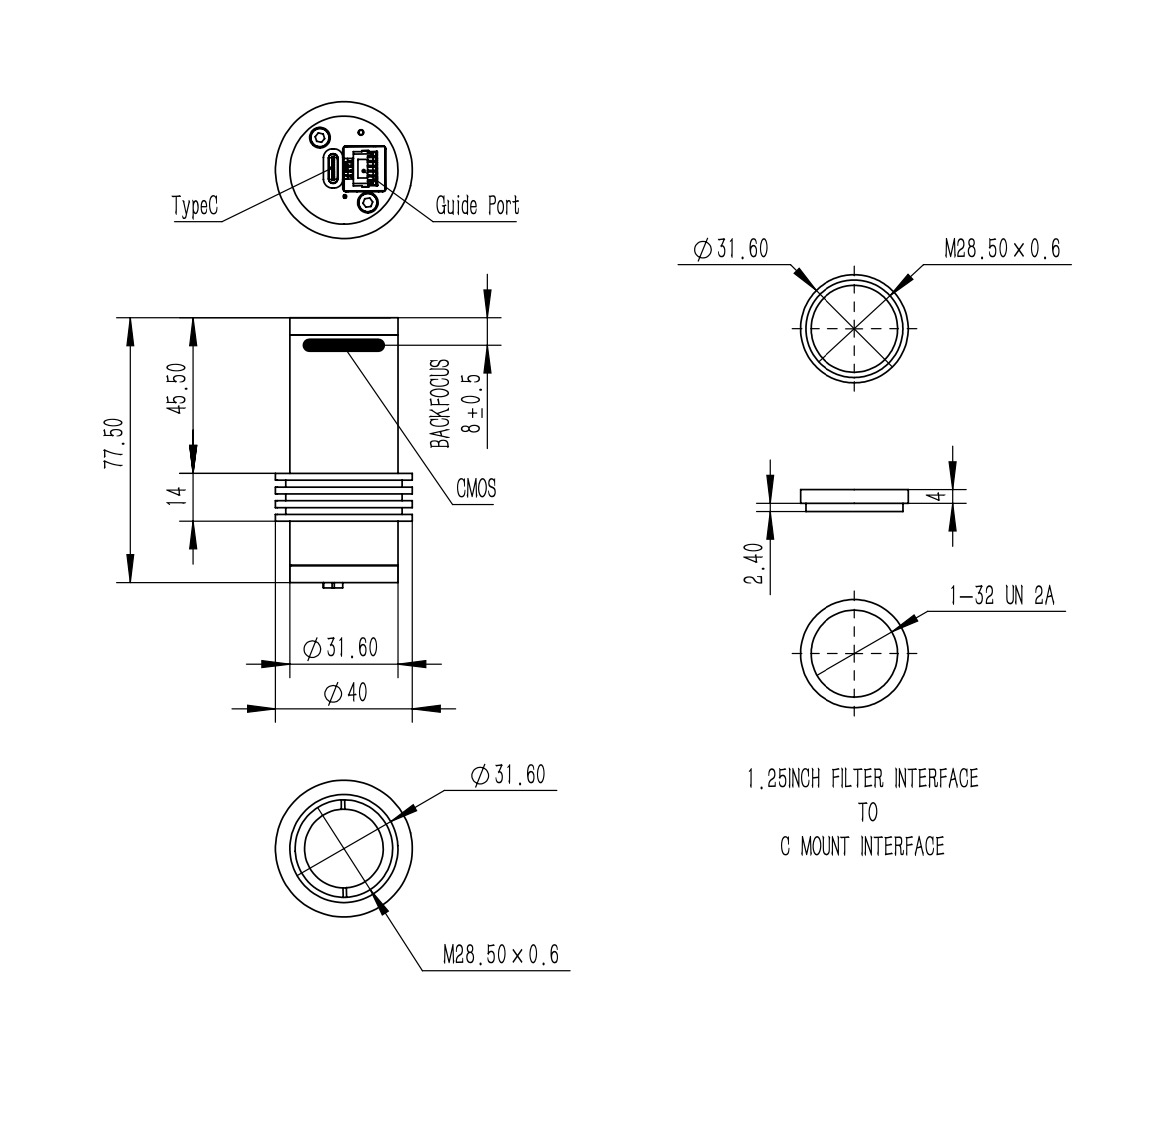
The BFL of V2 cam is only 8mm, which means you can easily compat a V2 cam with your OAG. The basic top adapter includes 1.25 inch threads and you can still use your 1.25 inch filter.
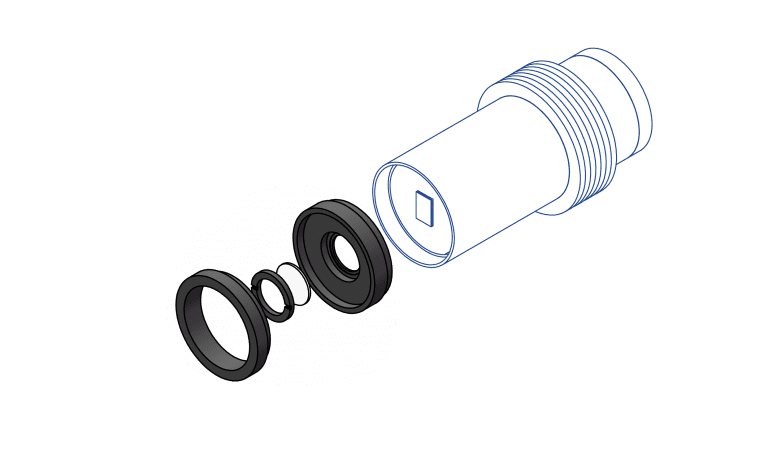
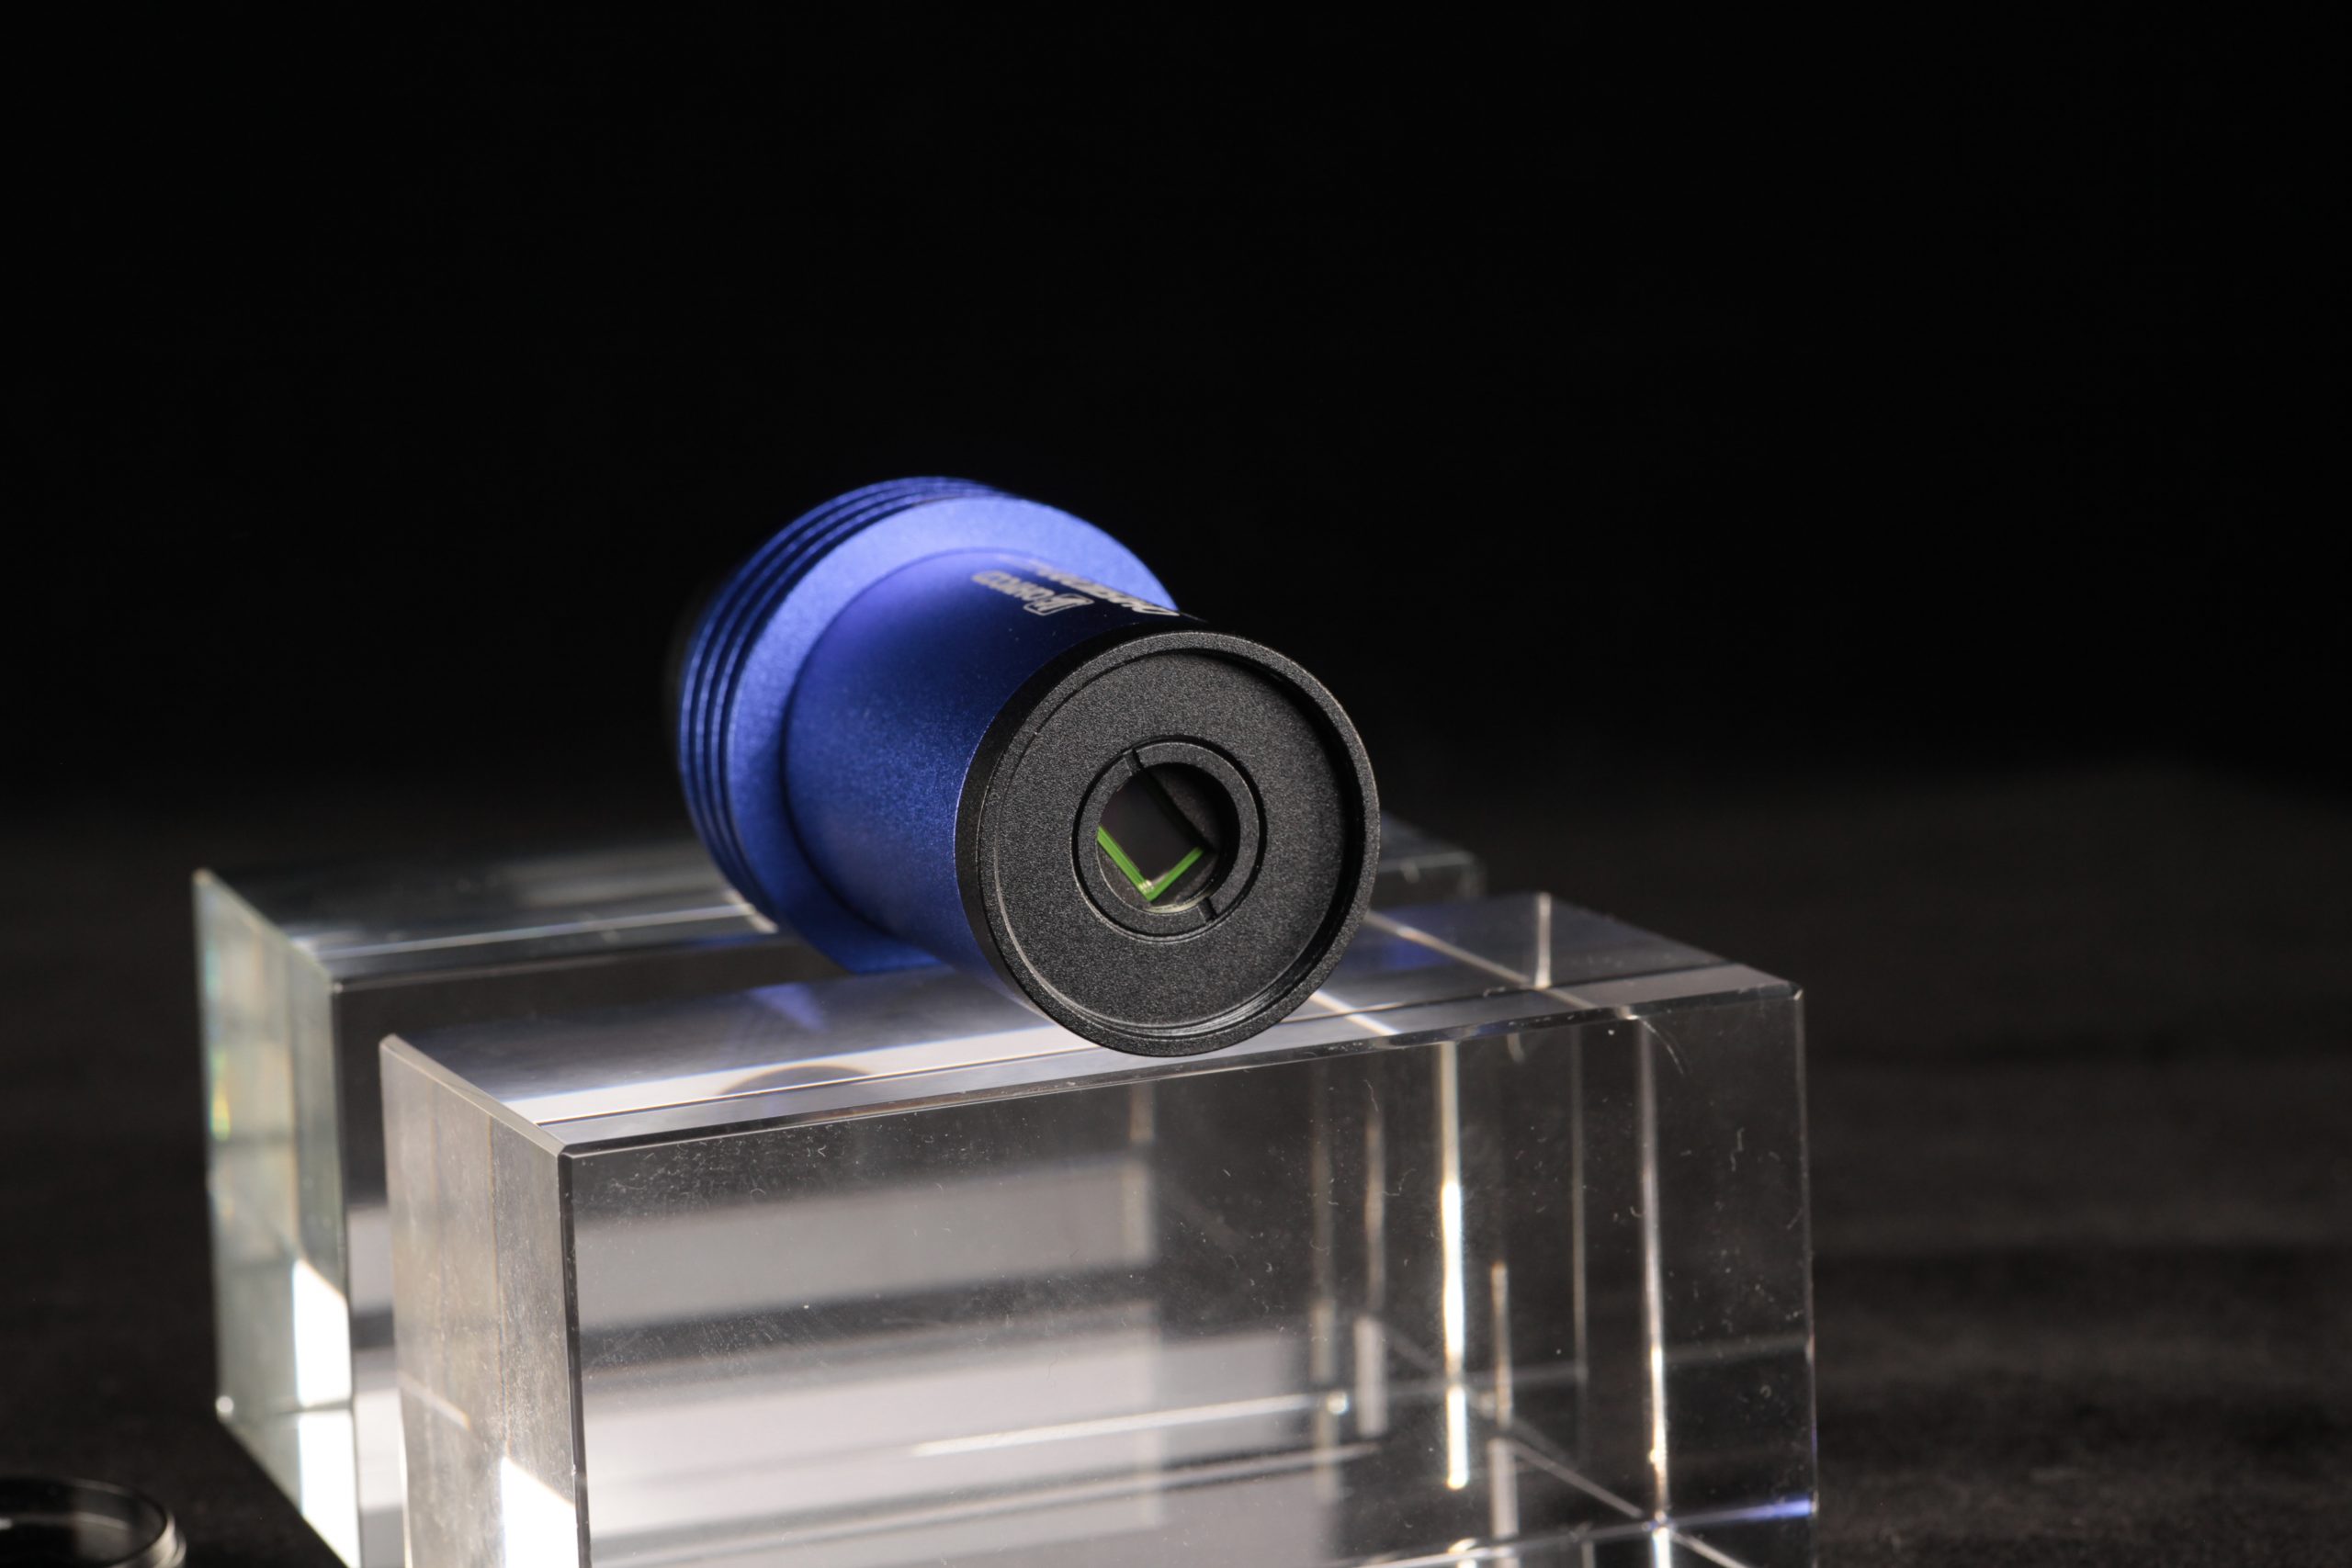
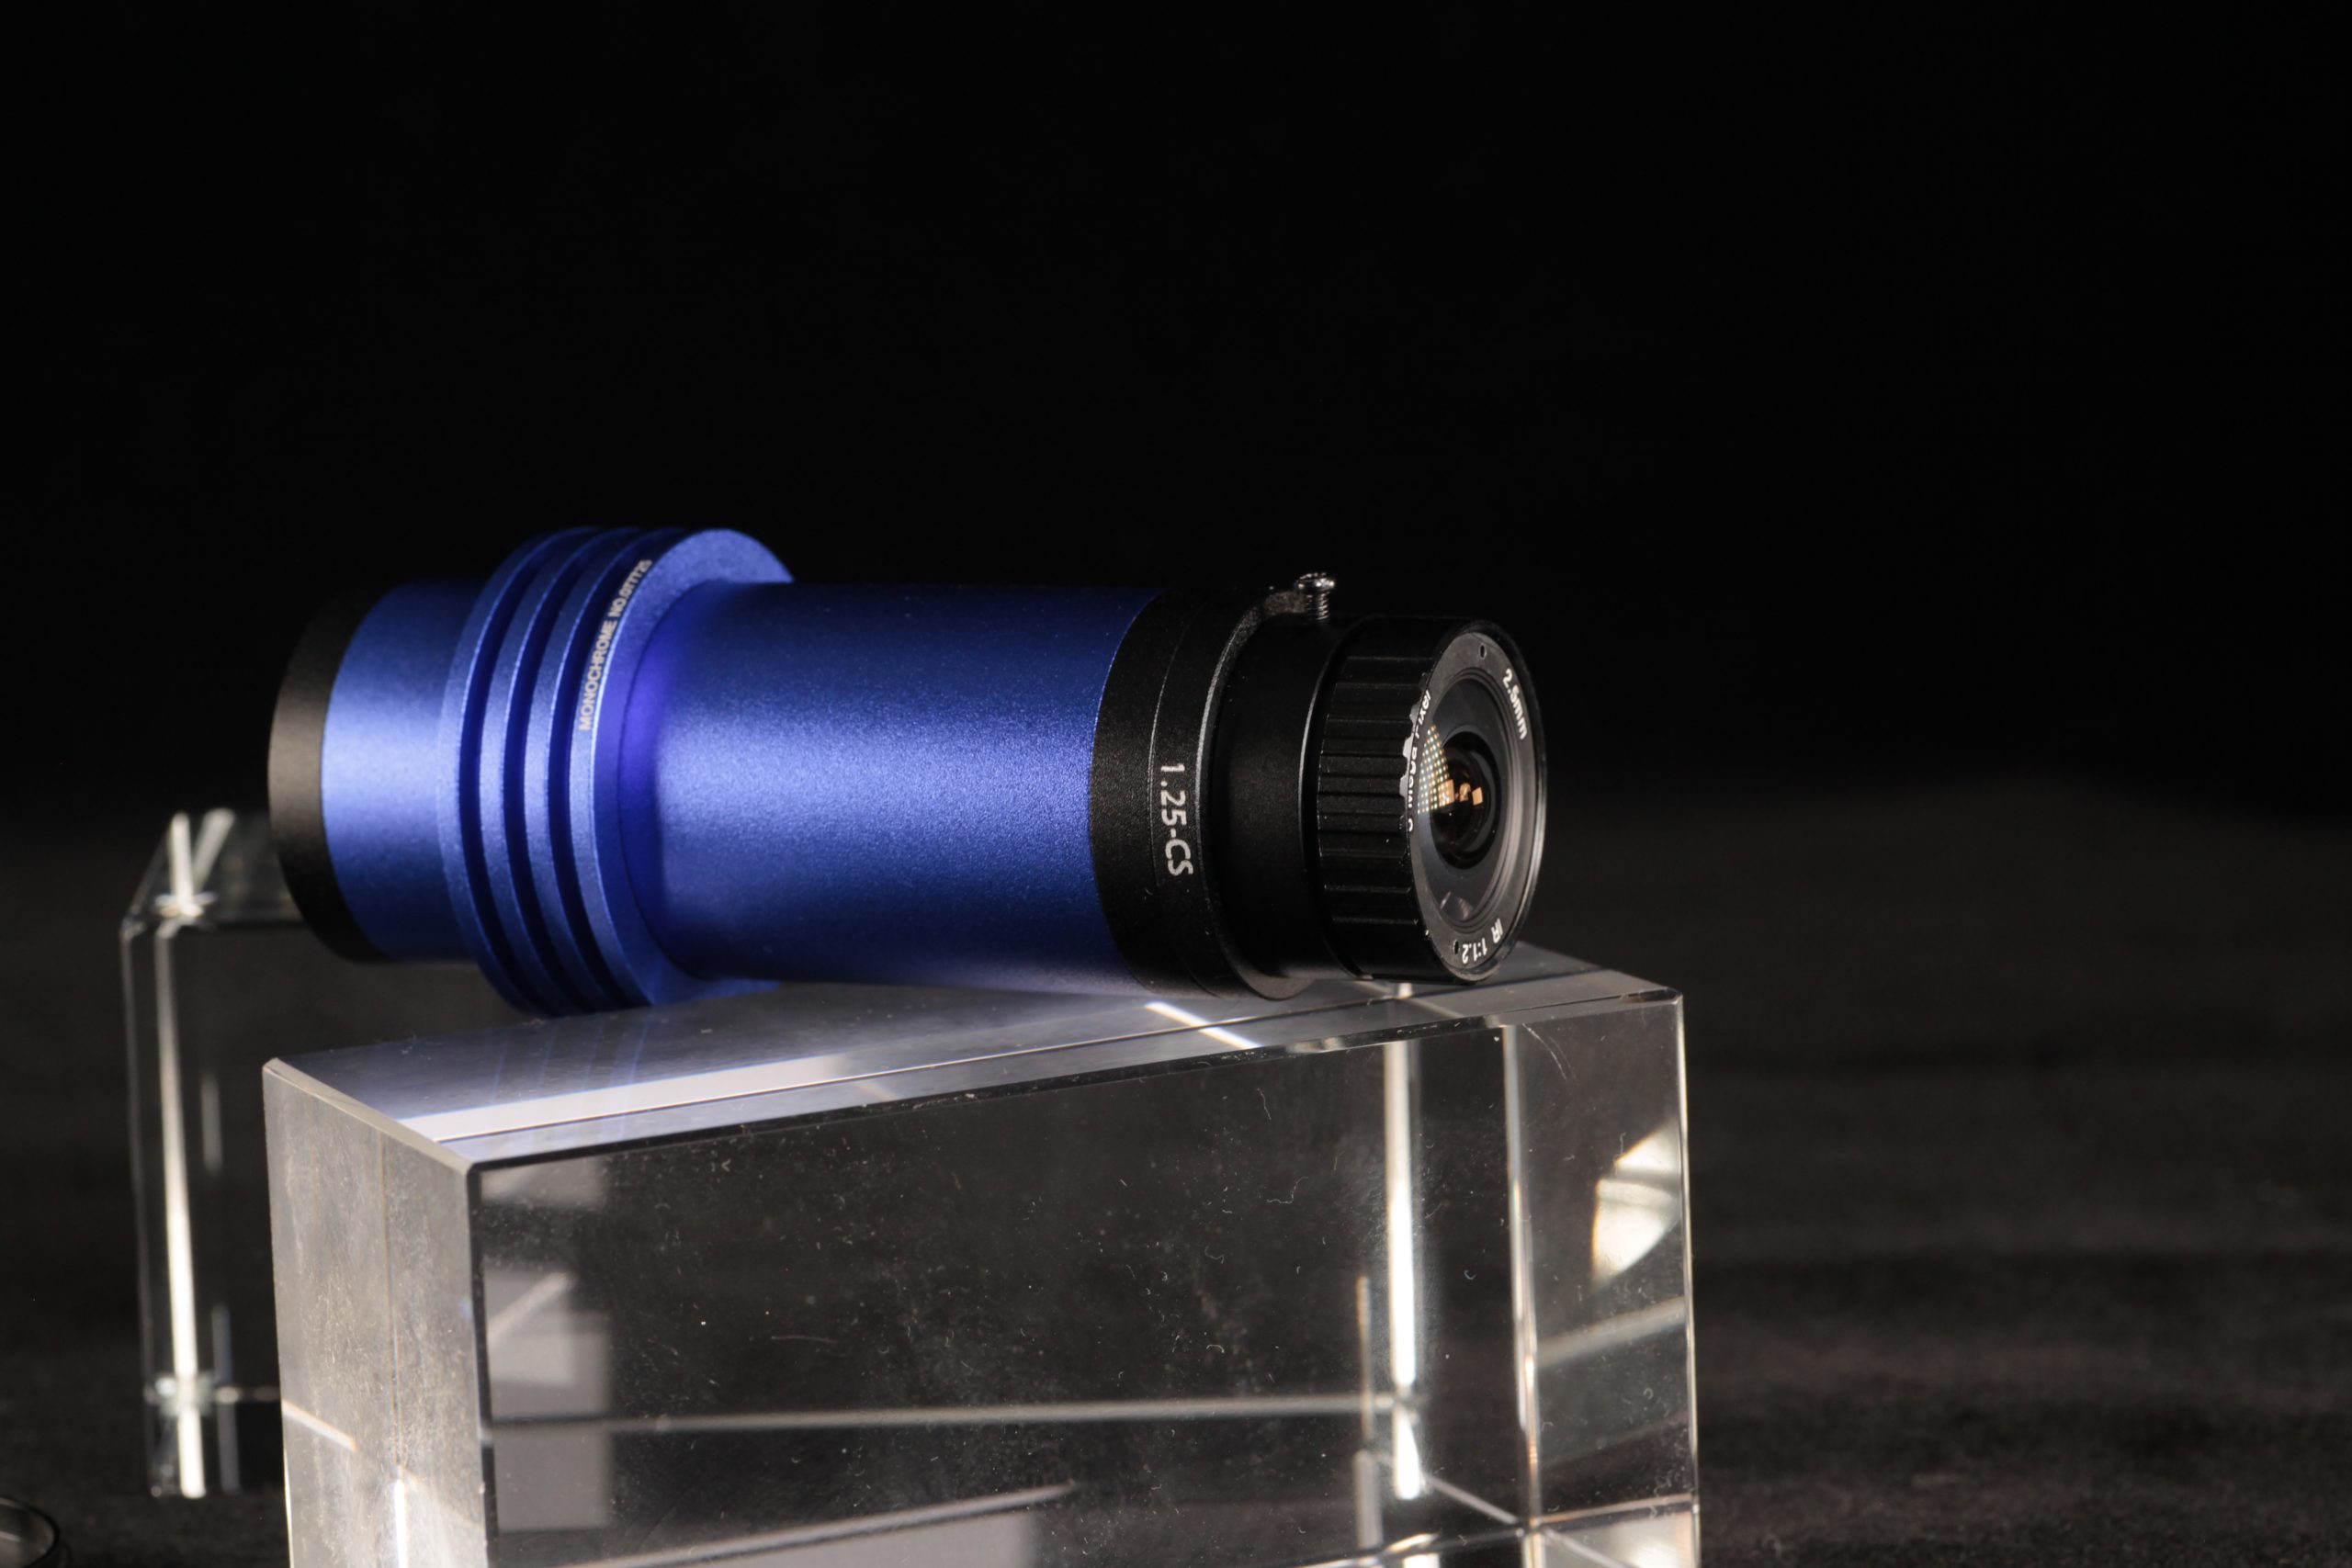
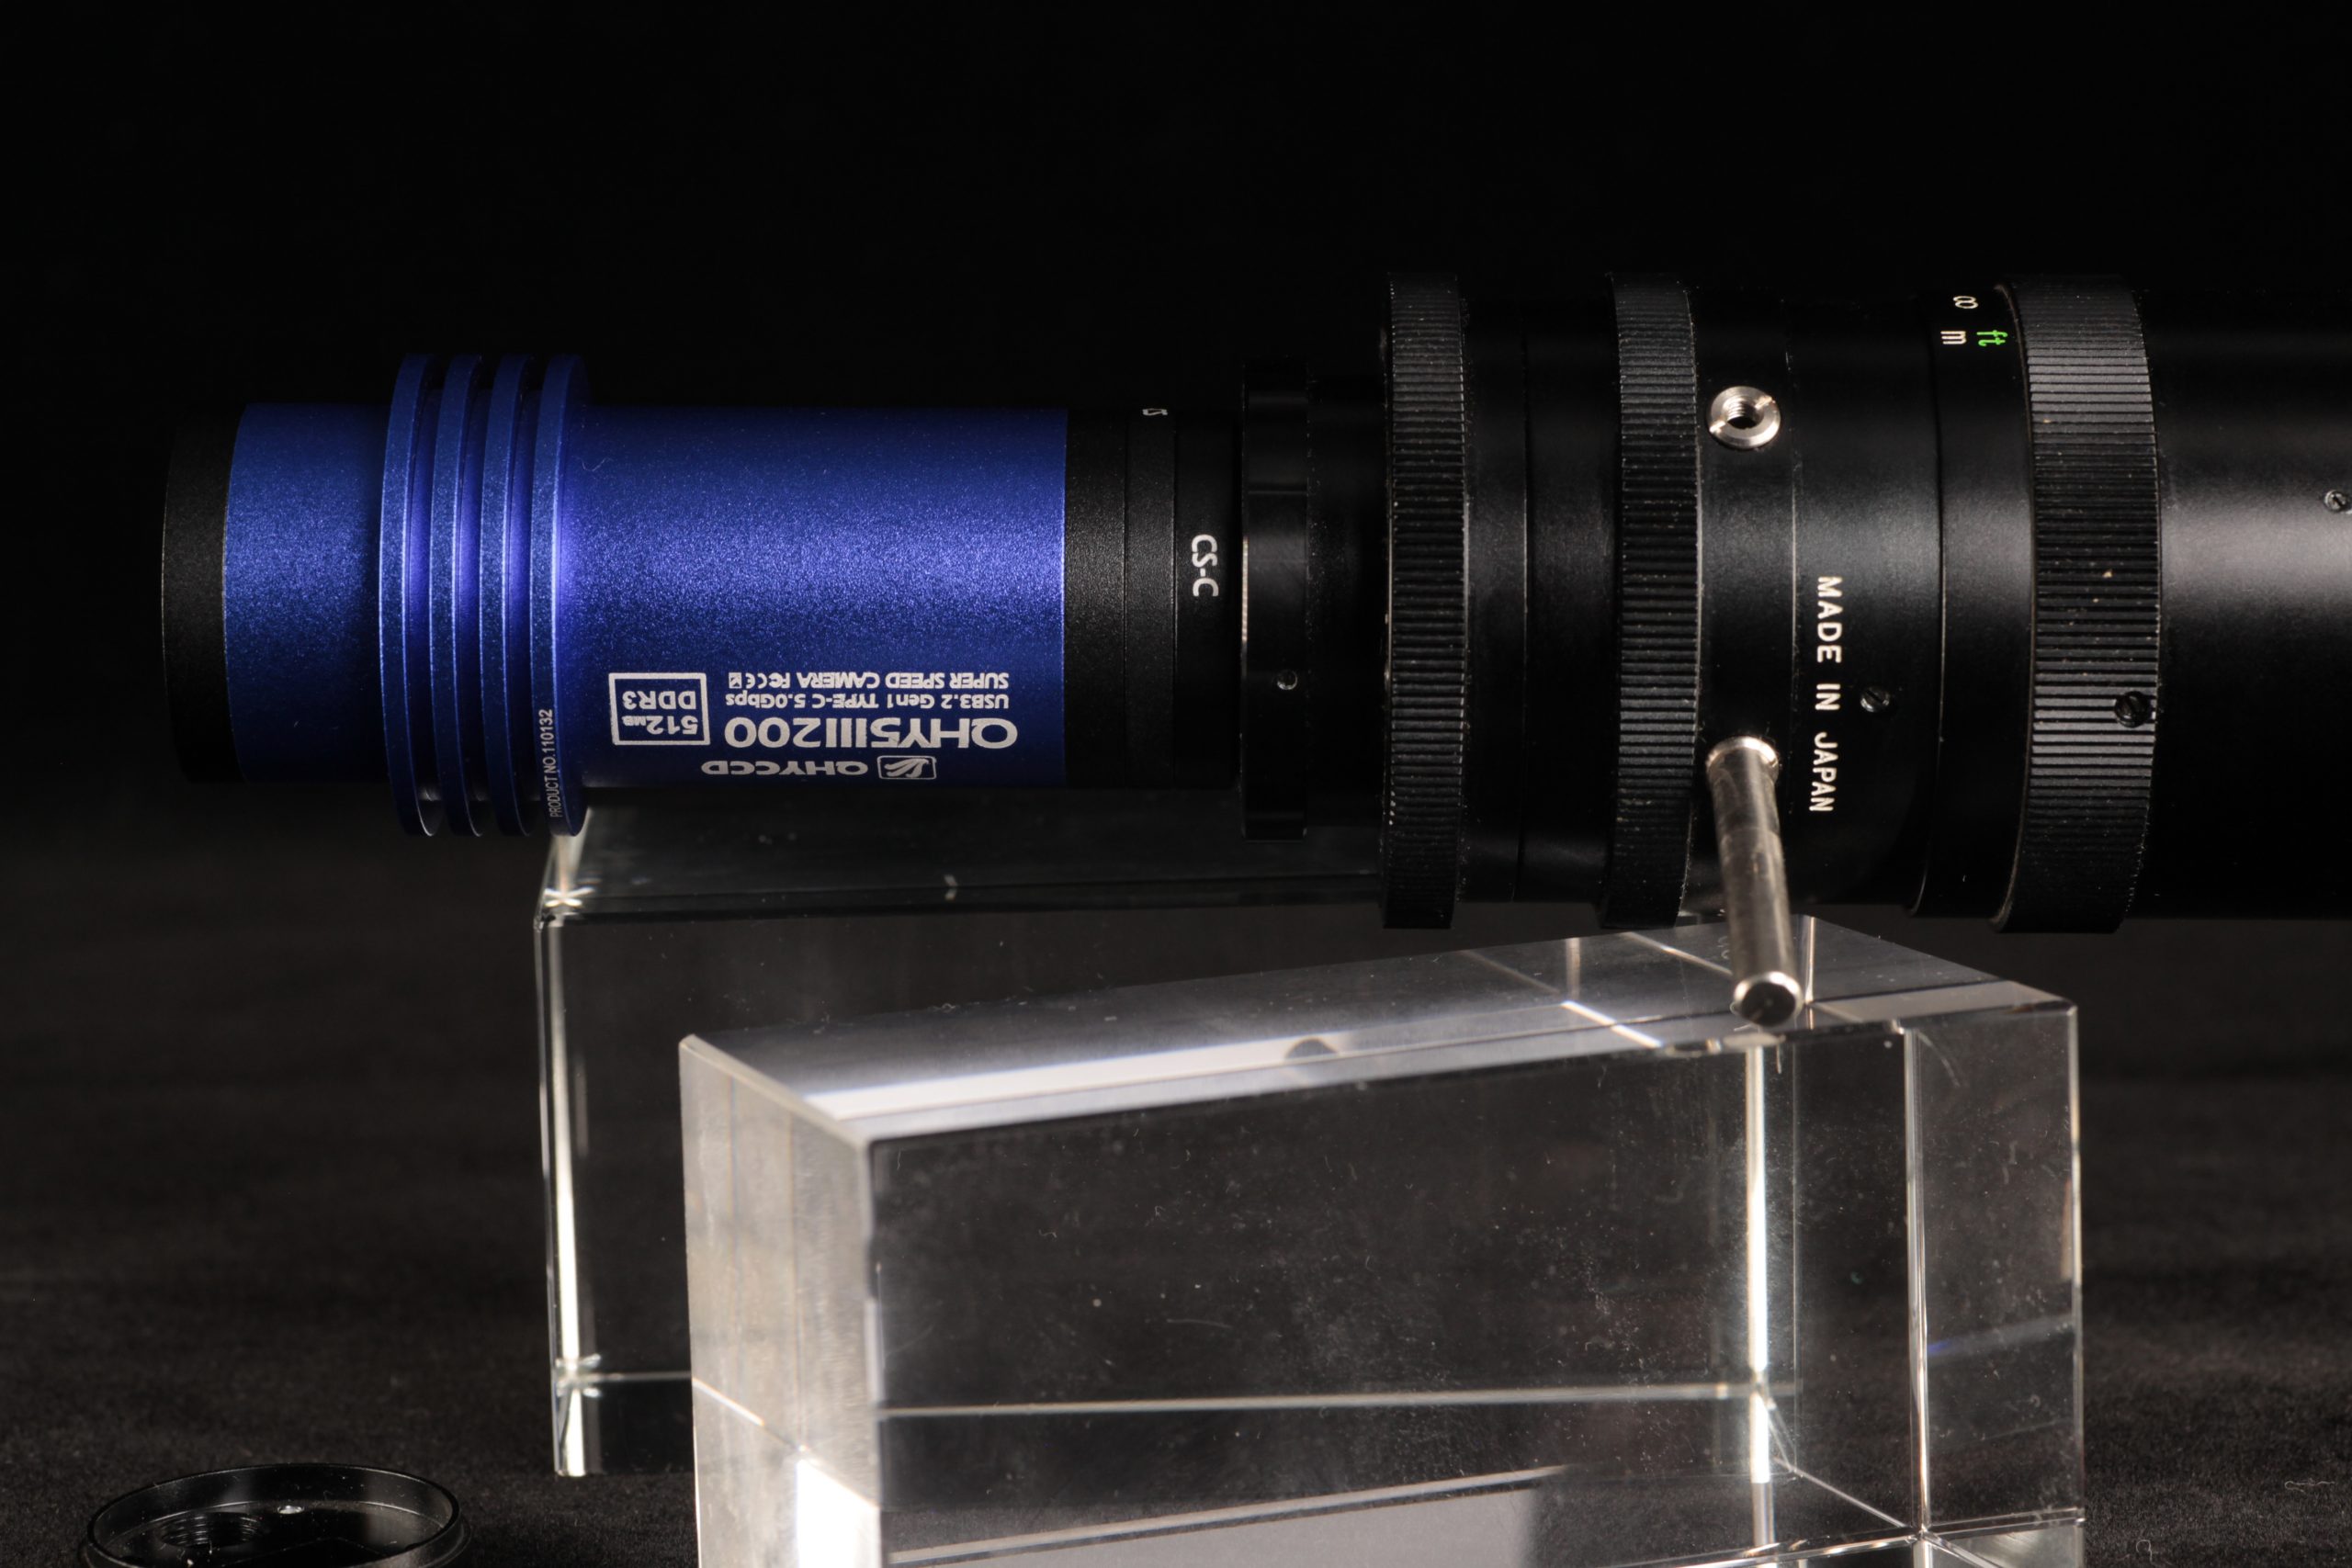
The top adapter glass of V2 can be easily swiched. One of the adavantage of changable top glasses is you can use one filter even you’re using Lens! You can add a 1.25inch-cs adapter to connect CS lens, or add a second CS-C lens for C-mount lens. The two adapters are all standard accessories of V2 cams.
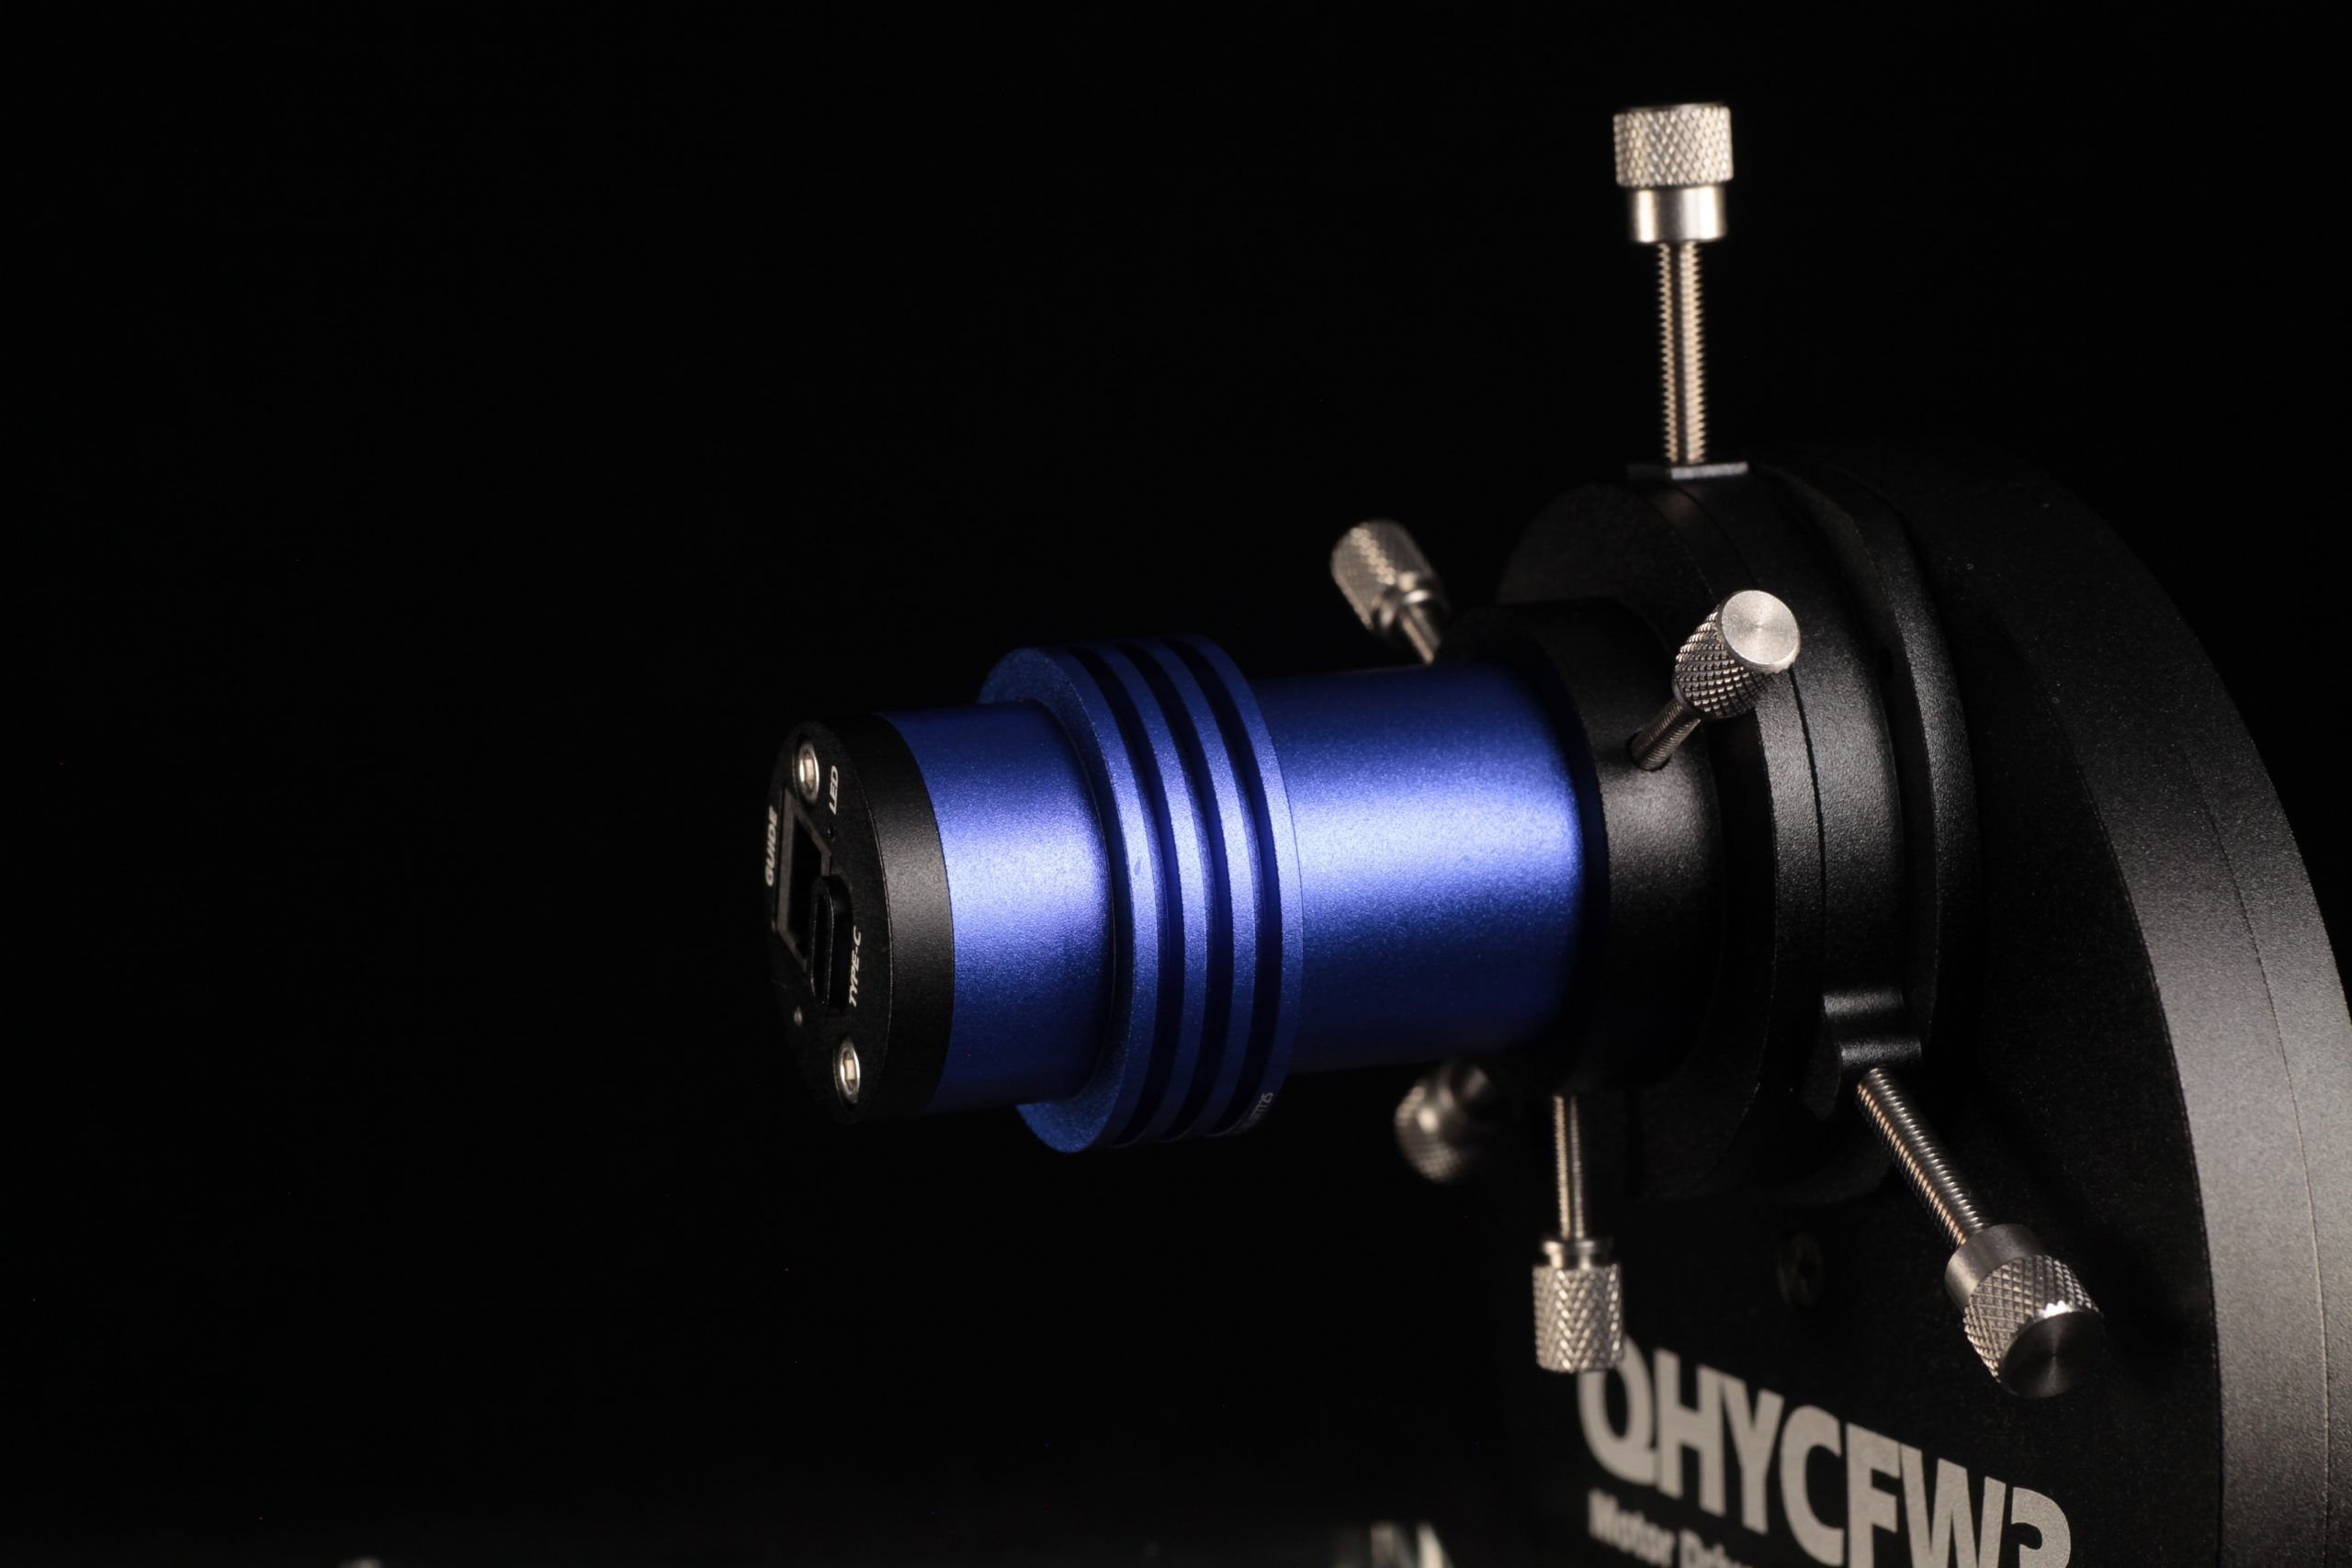
By the way, there’s a 1.25-inch filter wheel adapter to connect your mono planetary cam with the QHYCFW3-S filter wheel.
 The new QHY5III (Ver.2) series cameras all use the USB3.2 Gen1 Type-C interface. Compared to the USB3.0 Type-B interface used in the previous generation, the Type-C interface has a longer life and is more flexible.
Tips: It is recommended to use the official standard Type-C data cable of QHYCCD. As the market is flooded with a large number of poor-quality Type-C cables, casual use may lead to the camera malfunctioning. If you use your own spare cable, please make sure it is a high-quality cable.
The custom interfaces of the previous generation of planetary cameras and guiders has been replaced in the QHY5III (Ver.2) cameras with a more universal ST-4 compatible guiding interface. Now, even if the guiding cable is lost or damaged, you will be able to easily get a replacement on the market at a low cost.
 The new QHY5III (Ver.2) series of cameras is equipped with a status indicator at the back of the camera. If the camera experiences an abnormal status, the multi-colored indicator light will help to determine the situation with different colors signifying different conditions. During normal operation this indicator light is off, so there is no worry about light contaminating the image.
| Model | QHY5III585C |
| CMOS Sensor | Sony IMX585 BSI Sensor |
| Pixel Size | 2.9um*2.9um |
| Effective Pixel Area | 3856*2180 |
| Effective Pixels | 8.4 Mega Pixel |
| Sensor Size | 1/1.2inch |
| Fullwell Capacity | 32ke- |
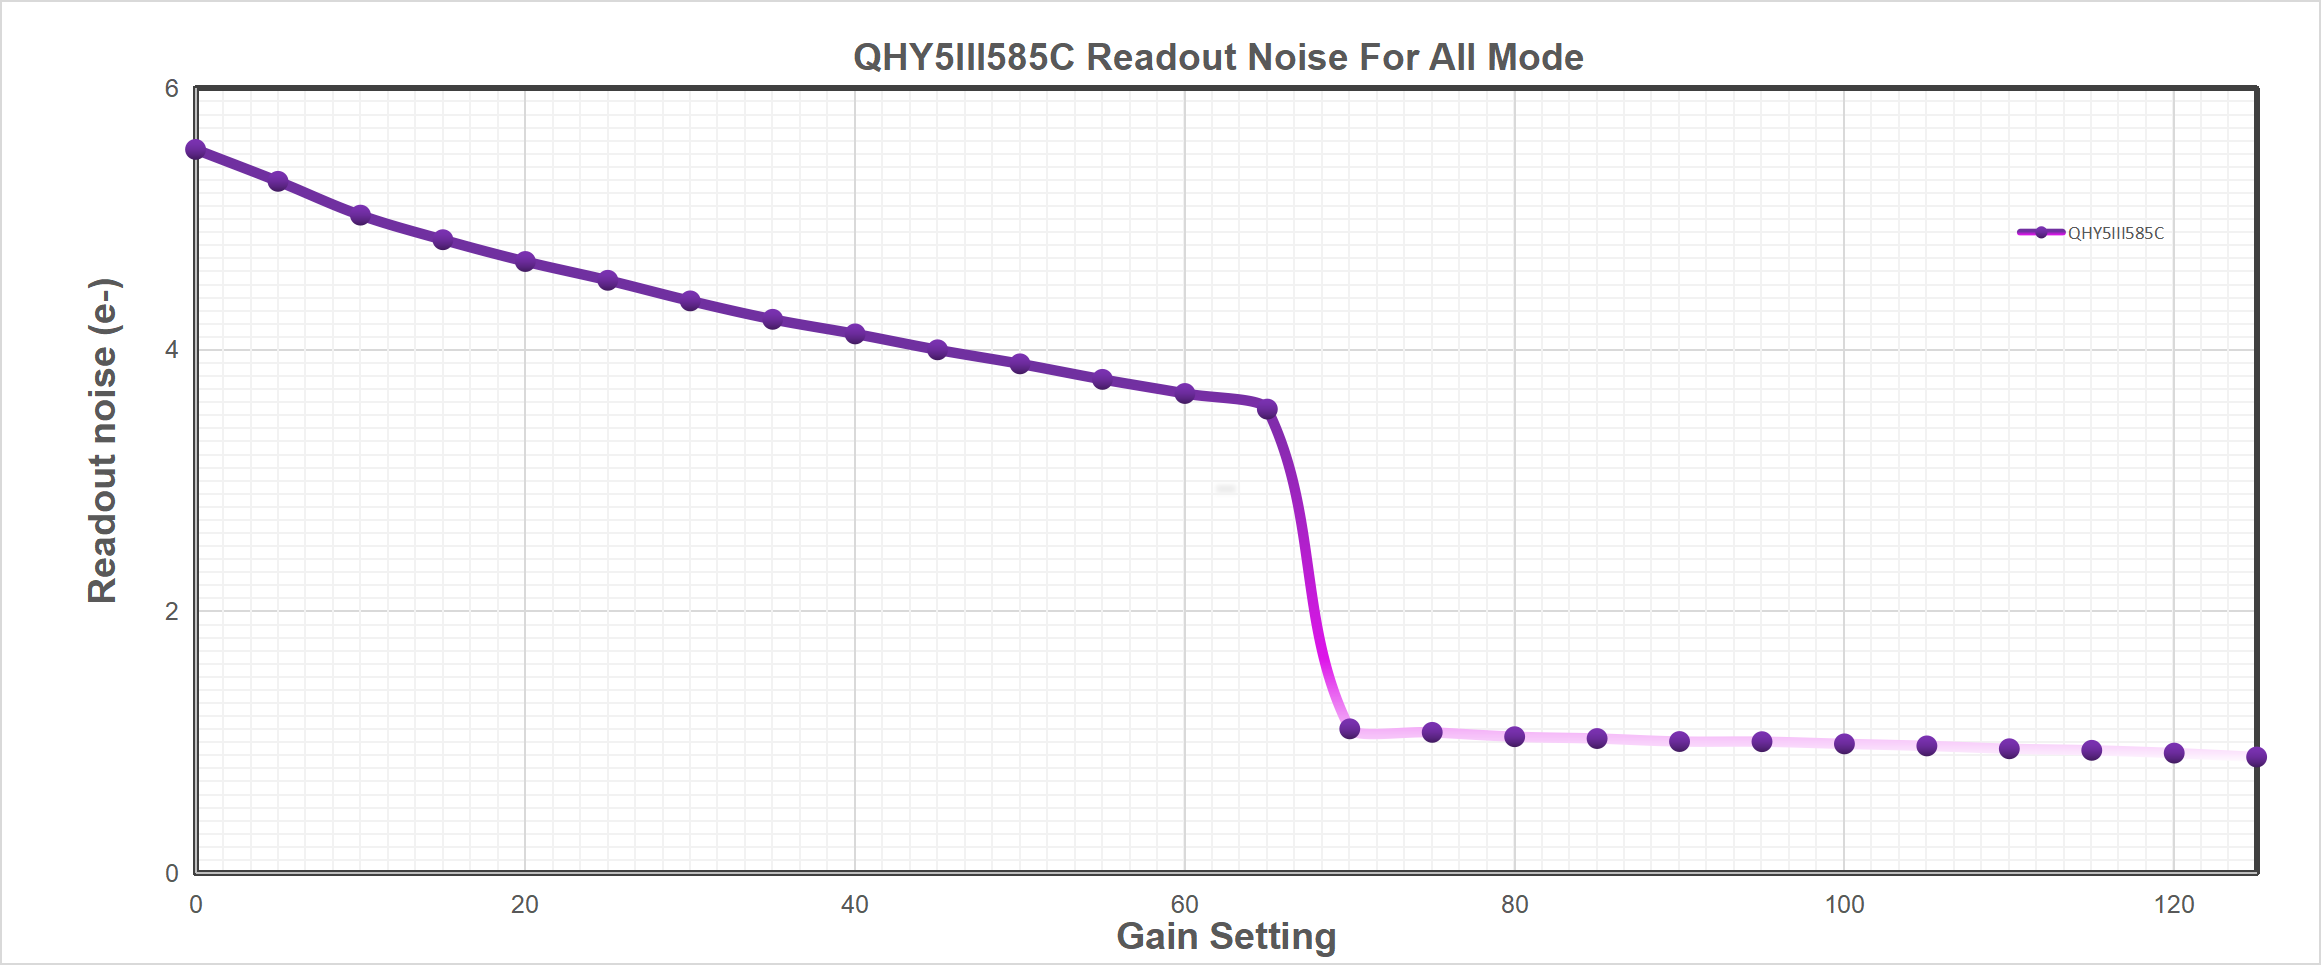
| Readout Noise | 0.8-5.5e- |
| AD Sample Depth | 12-bit (output as 16-bit and 8-bit) |
| Built-in Image Buffer | 512MB DDR3 Memory |
| ROI Frame Rate | Full Resolution 41.5FPS @8BIT 23.5FPS @16BIT
1080Lines 82FPS @8BIT 47FPS @16BIT 640Lines 135FPS @8BIT 79FPS @16BIT |
| Exposure Time Range | 11us-900sec |
| Shutter Type | Electronic Rolling Shutter |
| Computer Interface | USB3.2 Gen1 Type-C |
| Guide Port | st4 |
| Telescope Interface | 1.25-inch, compatible with CS interface or C interface by changing the front-end connector
(An IR-Cut filter and an IR850nm filter are included in the standard version) |
| Back Focal Length | 17mm(with adapter);8±0.5mm(without adapter) |
| Weight | 90g |
The camera requires an input voltage between 11V and 13.8V. If the input voltage is too low the camera will stop functioning or it may reboot when the TEC power percent is high, causing a drain on the power. Therefore, please make sure the input voltage arrived to the camera is adequate. 12V is the best but please note that a 12V cable that is very long or a cable with small conductor wire may exhibit enough resistance to cause a voltage drop between the power supply and the camera. The formular is: V(drop) = I * R (cable). It is advised that a very long 12V power cable not be used. It is better to place the 12V AC adapter closer to the camera.
First connect the 12V power supply, then connect the camera to your computer via the USB3.0 cable. Make sure the camera is plugged in before connecting the camera to the computer, otherwise the camera will not be recognized. When you connect the camera for the first time, the system discovers the new device and looks for drivers for it. You can skip the online search step by clicking “Skip obtaining the driver software from Windows Update” and the computer will automatically find the driver locally and install it. If we take the 5IIISeries driver as an example (shown below), after the driver software is successfully installed, you will see QHY5IIISeries_IO in the device manager.
Please note that the input voltage cannot be lower than 11.5v, otherwise the device will be unable to work normally.
All-in-one Pack supports most QHYCCD models only except PoleMaster and several discontinued CCD cameras.
Download Page: https://www.qhyccd.com/download/
Video Tutorial: https://www.youtube.com/embed/mZDxIK0GZRc?start=1
- Since most of the contents of All-in-one package are plug-ins that support third-party software, the third-party capturing software that you want to use must be installed before the All-in-one package. Otherwise the program will report an error.
- ALL-IN-ONE Pack contains:
- System Driver, which is necessary for the camera operation and must be installed.
- WDM Broadcast Driver, which can provide a live signal to Obs and other live software, you can install it if you have such needs like opeing a live show.
- EZCAP_QT , which is developed by QHYCCD and can be used in QHY devices tests, and management of updates. So even if you won’t use EZCAP_QT for capturing, we suggest you install it.
- Ascom driver, which is necessary for the camera used in Ascom (the latest version of Ascom is 6.6).
- The two sorts of Ascom CFW Drivers correspond to two methods of controling the filter wheel: USB control and camera serial control. It is recommended that both drivers should be installed if you have a filter wheel.
- CP210X_VCP is a serial driver. Some computers come with the driver, but the computer without the driver may be failed of controling the filter wheel.
- SDKs for Third-party Software: Just pick and install the corresponding SDK according to the software you want to use. Don’t forget to check whether the software you are using is 32-bit or 64-bit and select the right SDKs.
- SHARPCAP is also included in the pack, you can choose 32-bit or 64-bit to install. This is authorized by SHARPCAP.
- QT LIB is a plug-in to ensure that 64-bit software can exeuate normally on some computers with poor compatibility.
- Difference between Stable version and Beta Version: Beta version is the latest version, which gives priority to support for the latest products (the stable version may not be compatible with those yet), and has some of the latest optimized ,but experimental features. The stable version is older than the beta version but more stable, so it is recommended for beginners who are not using the latest products.
- Don’t let the camera connect to the computer during the All-in-one pack installation process; connect it to the computer after all the installation is complete.
Here we mainly take QHY5III462C as example. This User Guide can be applied to all QHY5III series Camera.

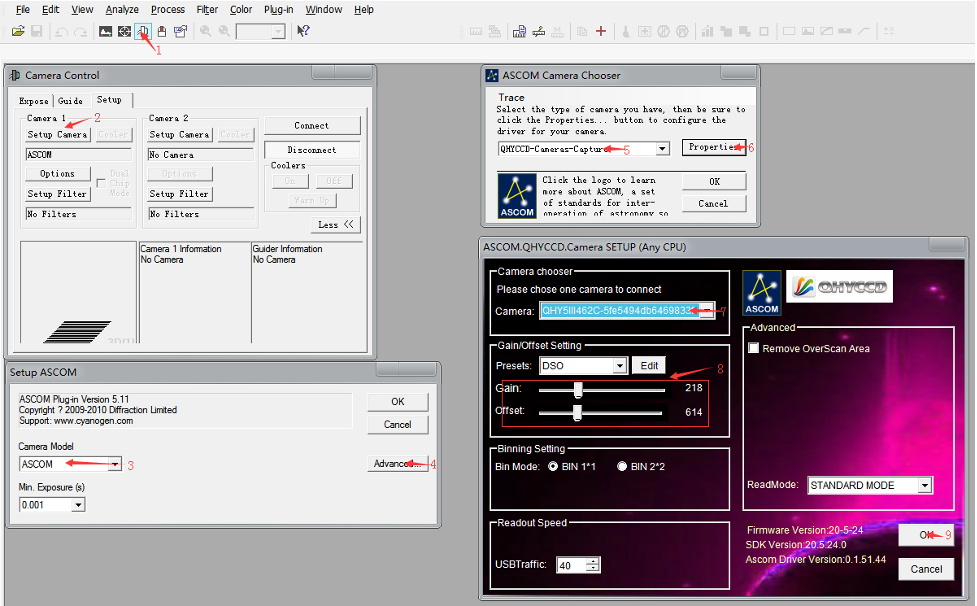
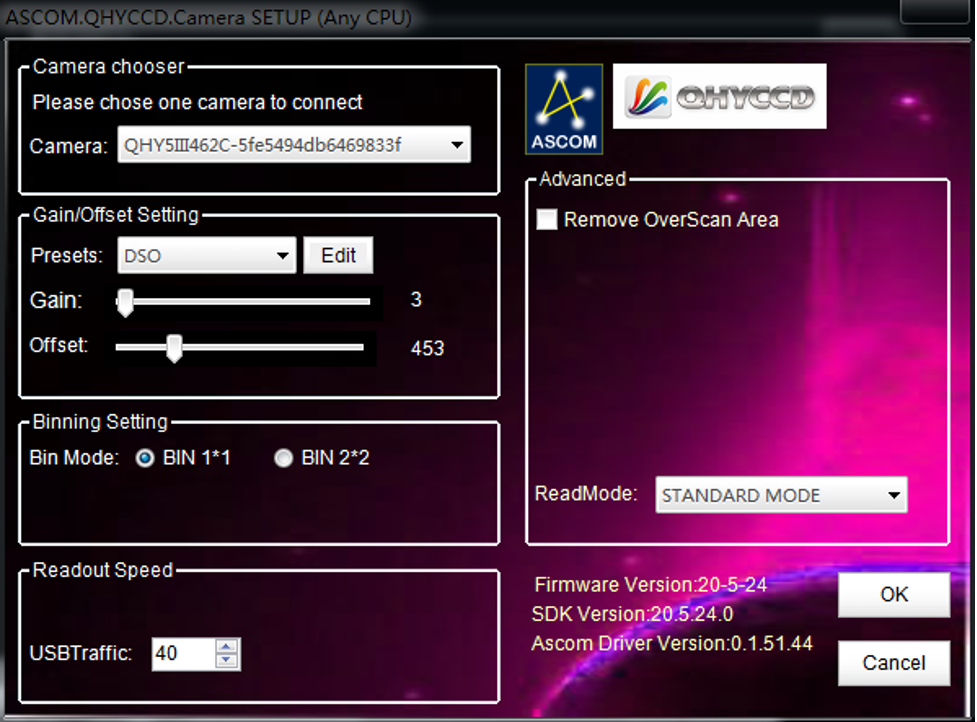
Adjust OFFSET. You will find that when the lens cover is closed and the image is completely black, the background of the image is still not completely black. Therefore, you need to adjust the OFFSET value to make the image darker. Generally speaking, for planetary shooting, setting the image background to very dark is not a big problem. For deep space shooting, a certain background should be retained, and it should not be completely black, otherwise it will lead to the loss of a weak background cloud.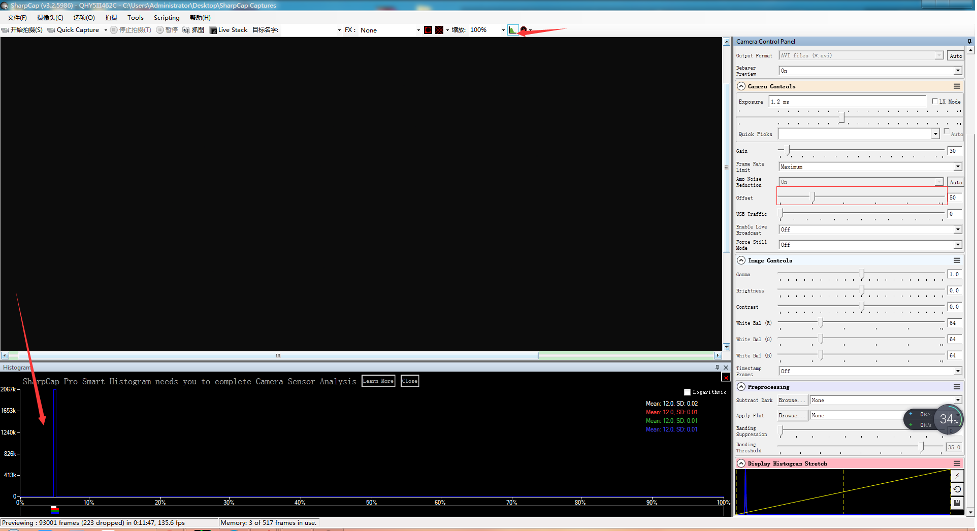
There are many astronomical software support ASCOM, you can connect QHY5III462C through ASCOM. Note that currently QHY5III462C only supports the ordinary ASCOM shooting mode, and does not yet support the ASCOM video mode. In order to obtain the maximum dynamic range and effect, the ASCOM driver uses the maximum number of digits transmission by default (for QHY5III462C, 12-bit), the image is stored in a 16-bit format, and the lower bits are filled with zeros.
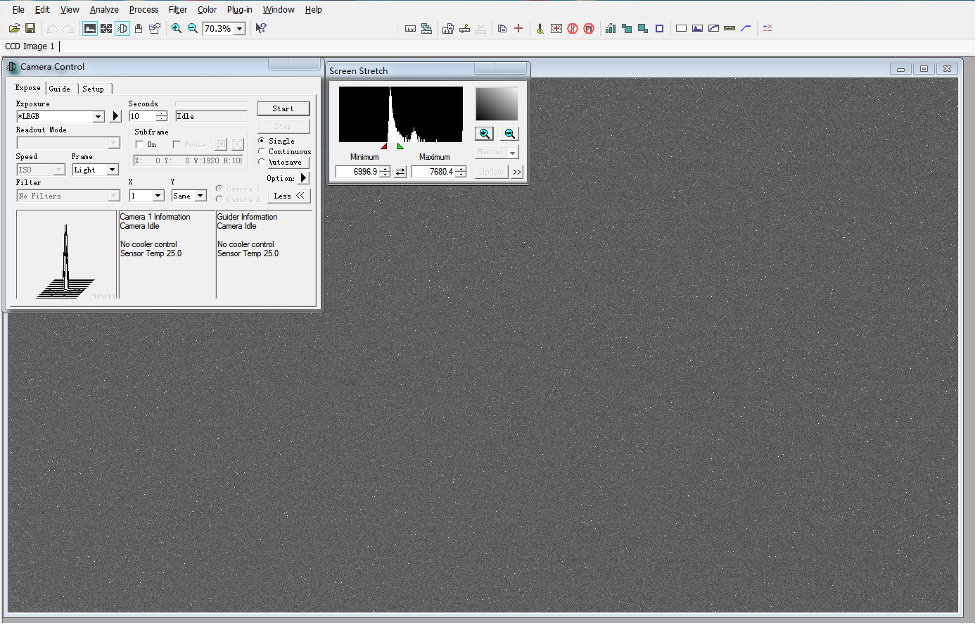
Use MAXIMDL for Plantery Imaging
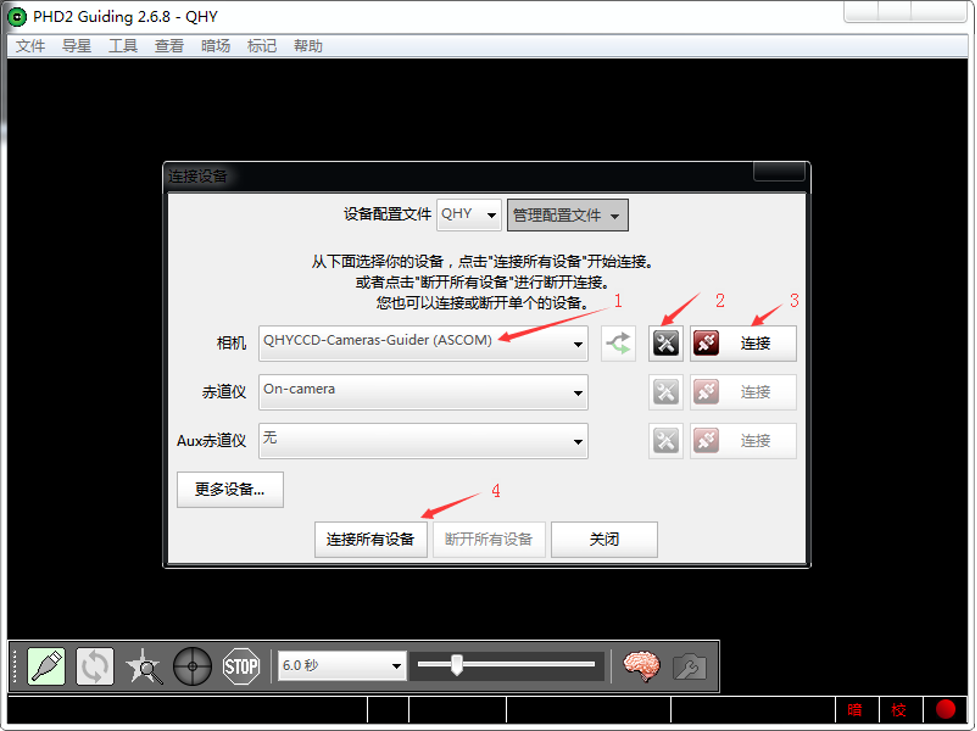
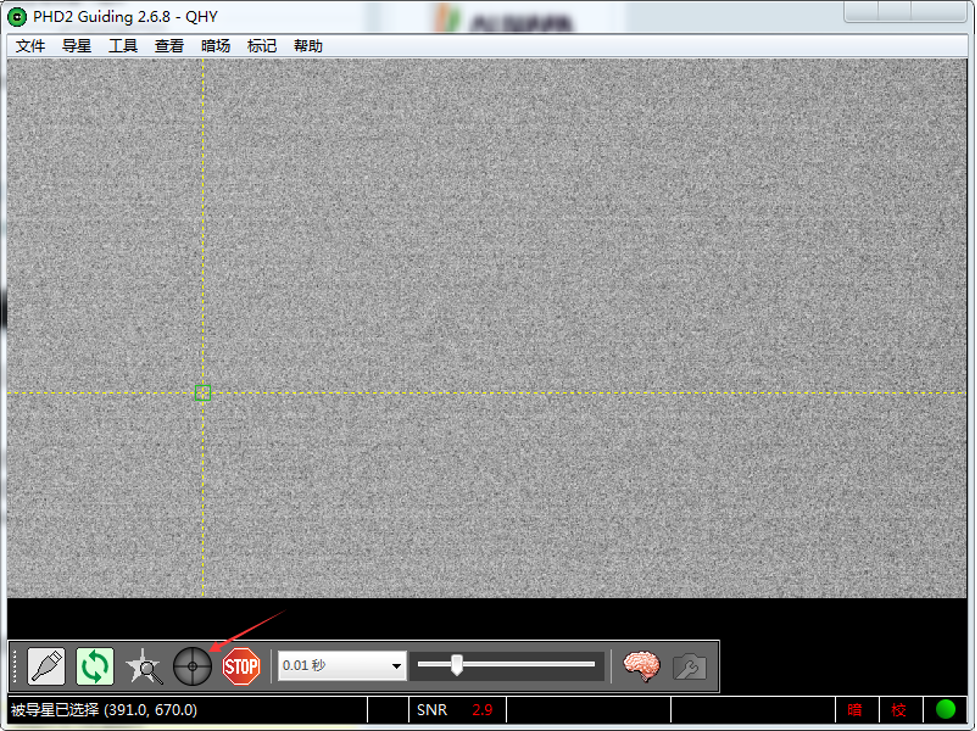
Using PHD for Guiding
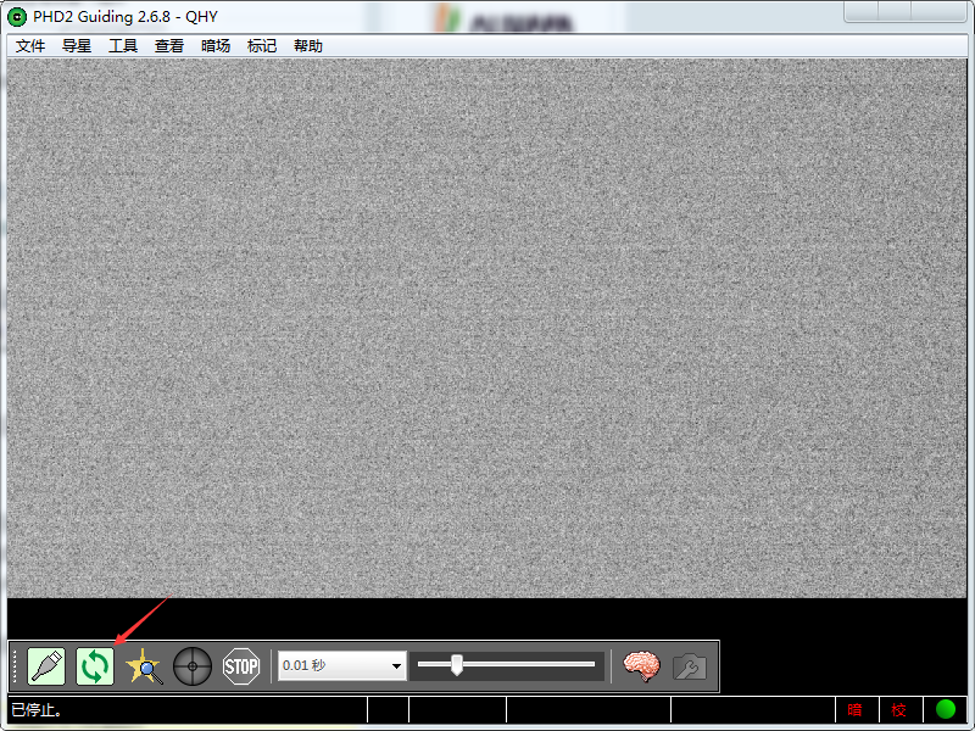
Select a star point on the screen, a green frame appears, and then select to start calibrating the equatorial mount and guide star.
QHYCCD BroadCast WDM Camera is a broadcast driver that supports QHYCCD cameras with video broadcast function, which can meet the needs of customers to send video images to other target software. For example, use sharpcap to connect a WDM-enabled camera, and the sharpcap display video image can be sent to other WDM-supported software for display, which is suitable for video online broadcast applications.
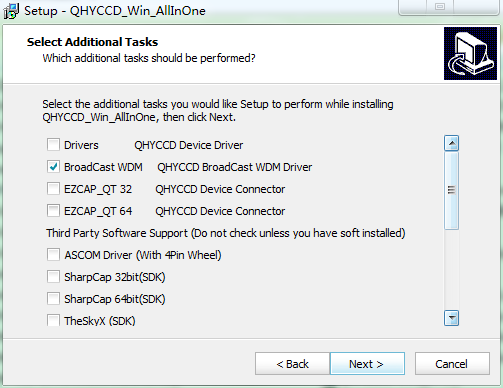
The installation process is over, right-click the computer to find the device manager, and check that the image device name is QHYCCD BroadCast WDM Camera, which means the installation is successful.
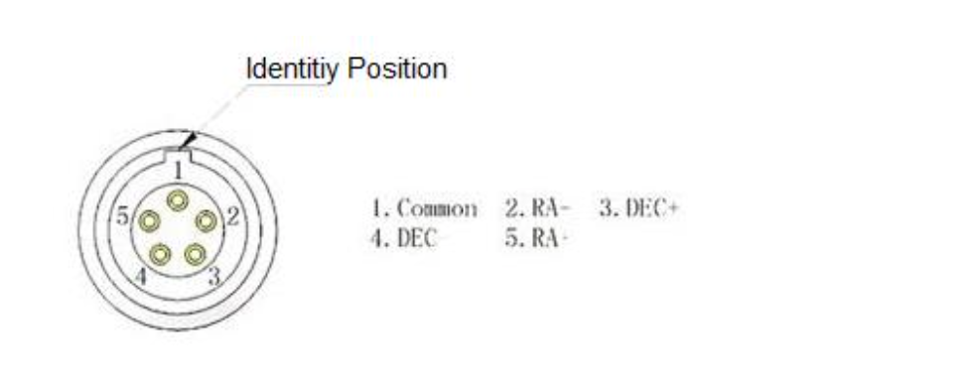
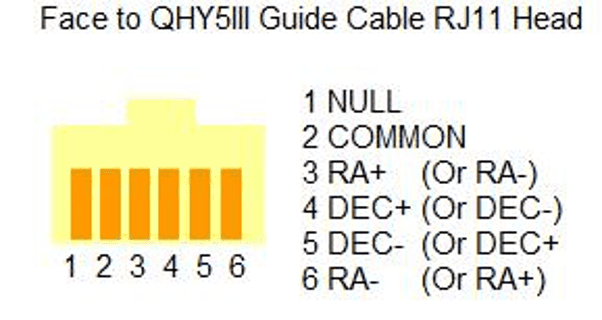
QHY5III Guiding Line Sequence Definition
The guide circuit contains an optocoupler isolator. The COMMON pin is generally connected to GND. Usually the four direction pins from the equatorial mount are internally pulled up on the equatorial mount circuit, so when the QHY5III sends out the guide star pulse, the optocoupler pulls it down to realize the output of the guide star command.
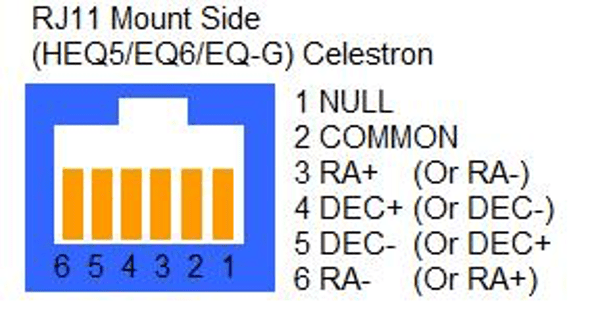
The line sequence of the socket at the equatorial mount is
If you use other types of equatorial mounts, please confirm whether the wire sequence is the same as the above.
Because QHY5III series cameras have a very high frame rate and data volume, not all computers can reach the maximum frame rate. Generally I7 quad-core is no problem. However, the CPU occupancy rate will also affect the maximum frame rate, so when using QHY5III, try to close other programs that occupy the CPU and free up the CPU to process the data. If the CPU usage is too high, the program will respond slowly or even crash.
