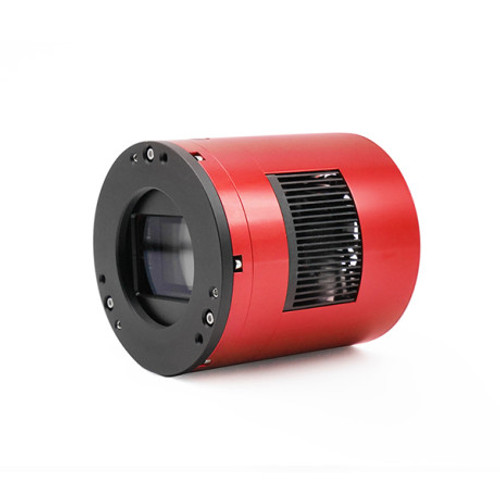
Product Overview
The QHY5III462 camera uses the Sixth Generation Sony 2.1 megapixel IMX462 STARVIS CMOS sensor. The pixel size is 2.9um making it the same size and resolution as the sensor used in the QHY5III290 camera that has been so successfully used for planetary imaging by some of the best planetary imagers in the world. Like other cameras in the 5III series, the QHY5III462 is USB 3.0 powered and controlled. No additional power is required.
The IMX462 sensor is back-illuminated and incorporates new technology that gives it some significant advantage over other planetary cameras: First, the IMX462 sensor has sHCG (Super High Conversion Gain) for very low read noise at high gain. This is ideal for stacking hundreds or thousands of short planetary images. Second, it is exceptionally sensitive in the NIR.
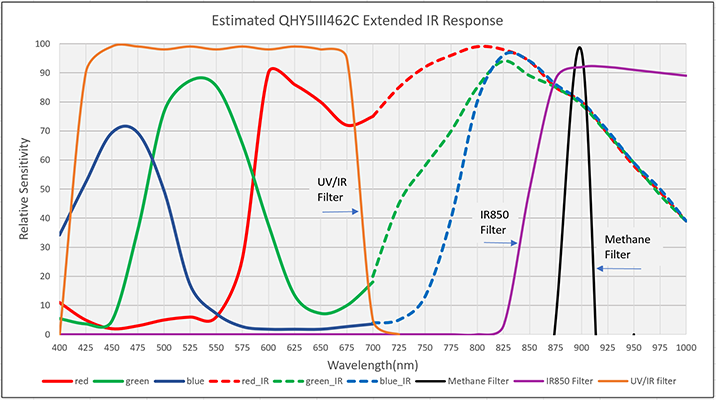
In this latest generation of sensors, the photodiode portion of the pixel well is physically deeper than in previous Sony BSI sensors, allowing photons of longer wavelength to penetrate deeper into the substrate. This dramatically increases the sensor’s sensitivity to red and near infrared (NIR) light. The RGB filters over the pixels become transparent at NIR wavelengths, so the sensor displays almost equal peak sensitivity to NIR light as it does to light in the visible spectrum.
The peak QE in the NIR around 800nm is as high as the peak QE in the visible wavelengths. For planetary imagers using a methane filter that passes light around 880nm this is welcome news.
 One benefit of the back-illuminated CMOS structure is improved sensitivity. In a typical front-illuminated sensor, photons from the target entering the photosensitive layer of the sensor must first pass through the metal wiring that is embedded just above the photosensitive layer. The wiring structure reflects some of the photons and reduces the efficiency of the sensor.
In the back- illuminated sensor the light is allowed to enter the photosensitive surface from the reverse side. In this case the sensor’s embedded wiring structure is below the photosensitive layer. As a result, more incoming photons strike the photosensitive layer and more electrons are generated and captured in the pixel well. This ratio of photon to electron production is called quantum efficiency. The higher the quantum efficiency the more efficient the sensor is at converting photons to electrons and hence the more sensitive the sensor is to capturing an image of something dim.
Logically, one would think, each generation of Exmor sensor would be built upon and incorporate all of the improvements of the generation immediately preceding. However, this was not the case with the fifth generation Exmor R sensors.
The first back-illuminated sensors used shallower pixel wells (like the third-generation front- illuminated designs) than the physically deeper pixels of the fourth generation. So, while the back- illuminated structure increased the sensitivity in the visible range by 2X, the shallower pixels did not improve the NIR. The answer to this is seen in the latest, sixth generation, Sony Exmor R sensors, like the IMX462. Using physically deeper pixels in conjunction with the back-illuminated structure has dramatically improved the sensor’s sensitivity to both the visible and near infrared wavelengths.
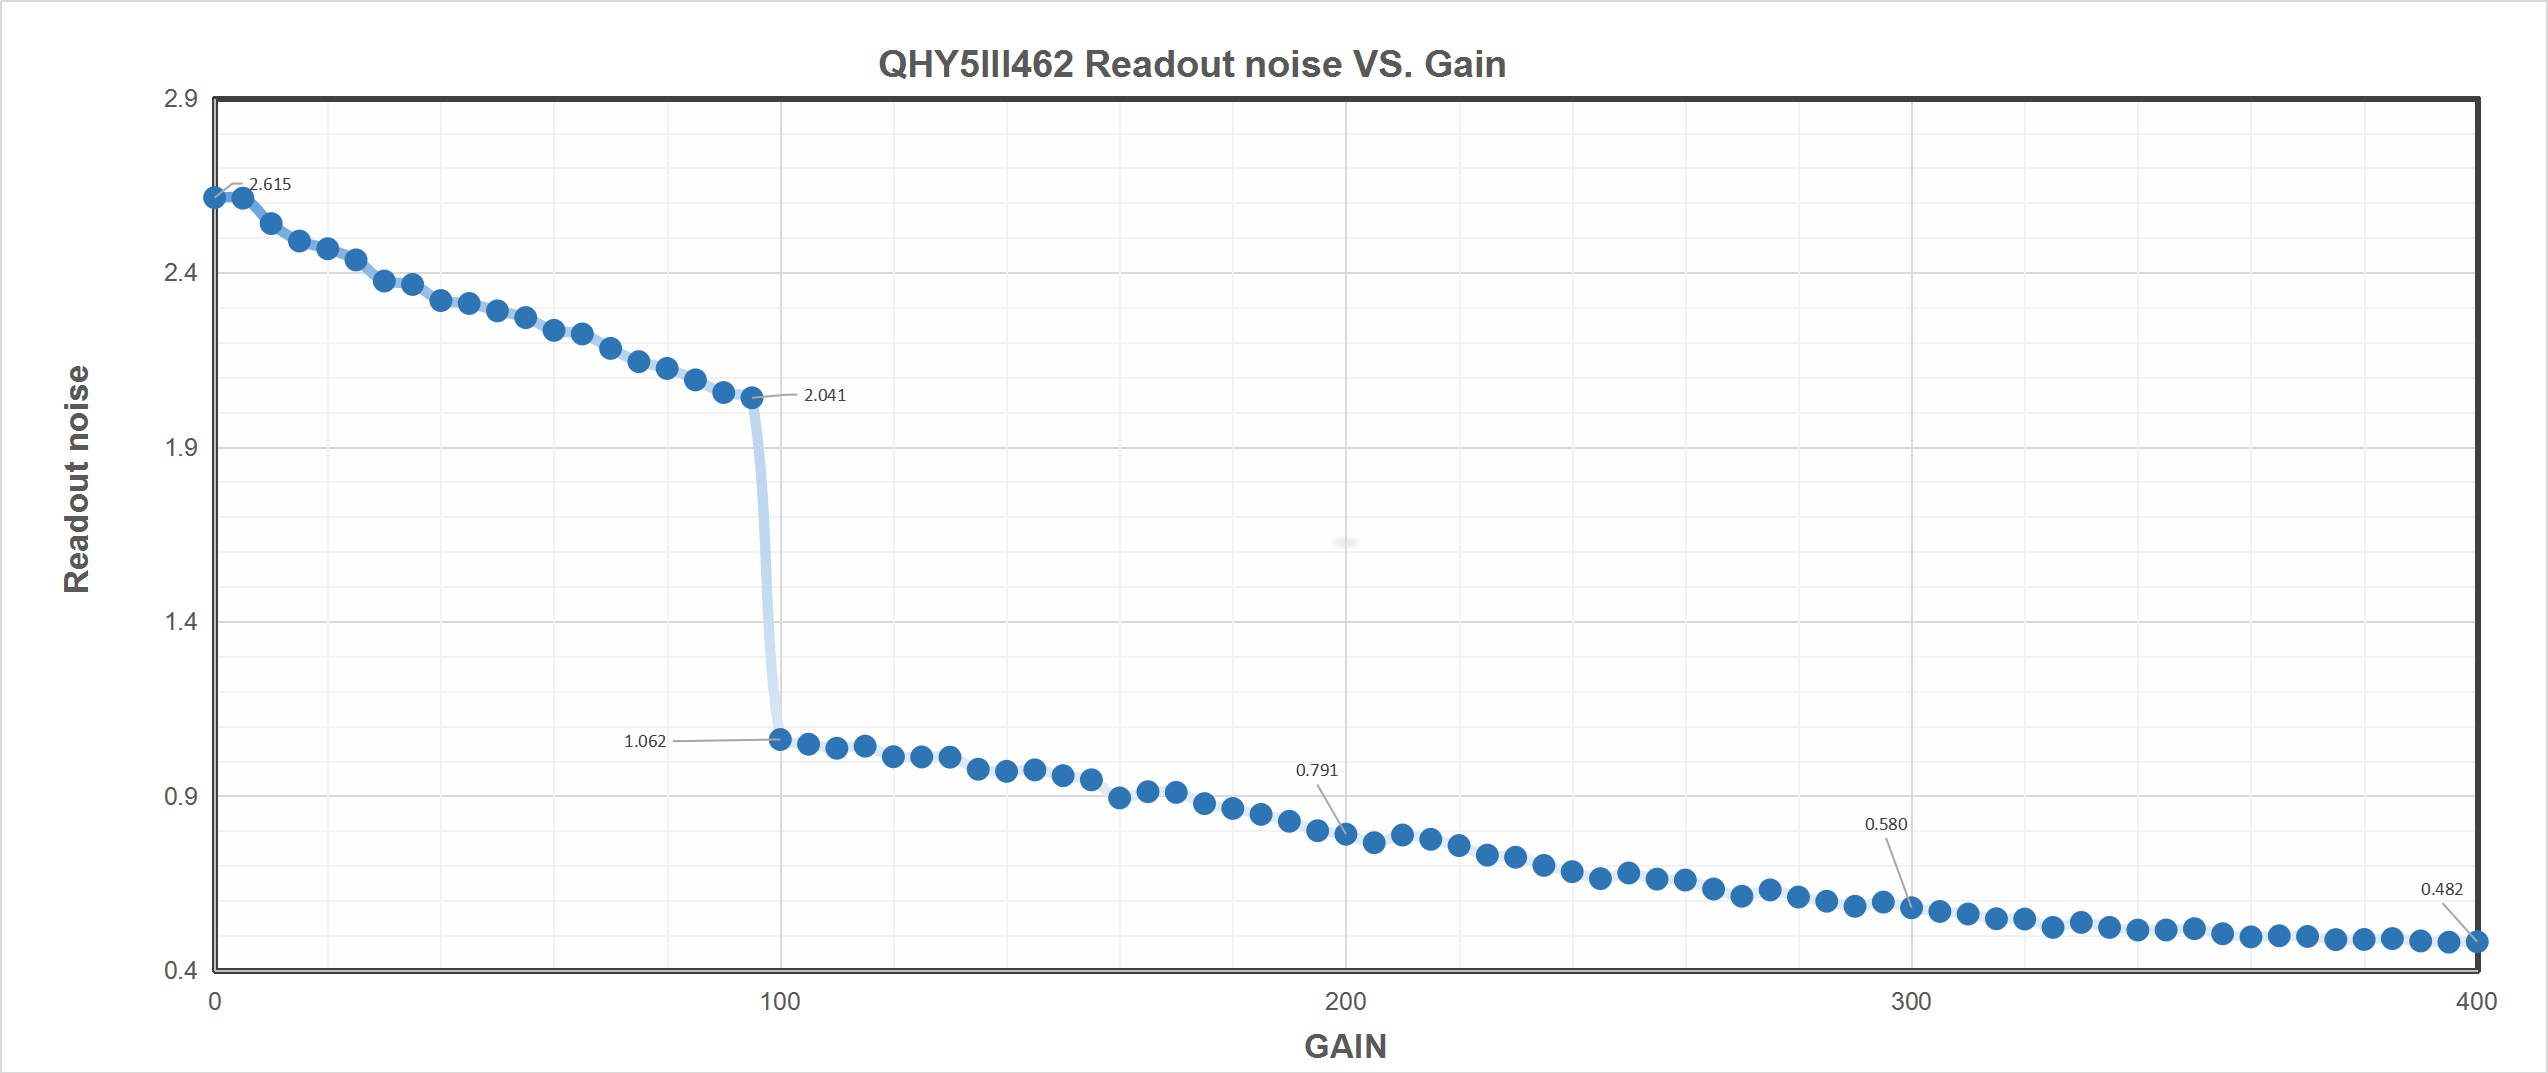
Another advantage of the QHY5III462 is the camera’s “Super High Conversion Gain” capability. By using a lower capacitance, a small amount of charge can be converted to a high voltage resulting in higher sensitivity in low-light conditions. The readout noise of the QHY5III462 in high gain mode is as low as 0.5 electrons!
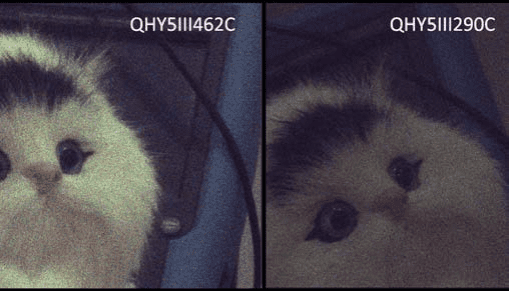
The test exposures below demonstrate the low light improvement over the IMX290 sensor. The QHY5III462C image is on the left and the corresponding QHY5III290C image is on the right. The low light conditions and exposures are identical for each top and bottom pair of images and a UV/IR filter was in place for each camera. So this test demonstrates the QHY5III462C’s increase in sensitivity and SNR over the QHY5III290C under the same conditions in the visual light spectrum alone.
The filter matrix in the IMX462 uses organic dye filters. These filters are very efficient at visible wavelengths but become completely transparent in the NIR. For this reason, good RGB color balance requires an external UV/IR filter that blocks NIR wavelengths.
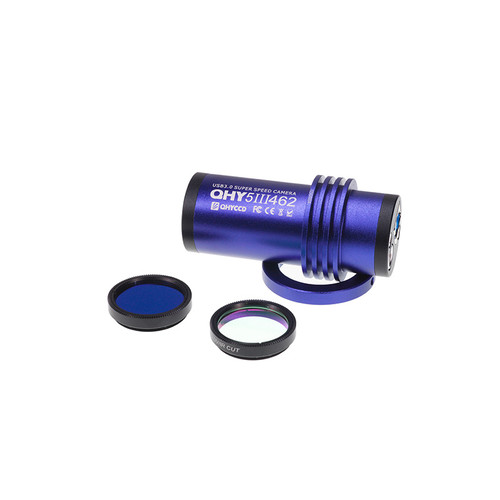
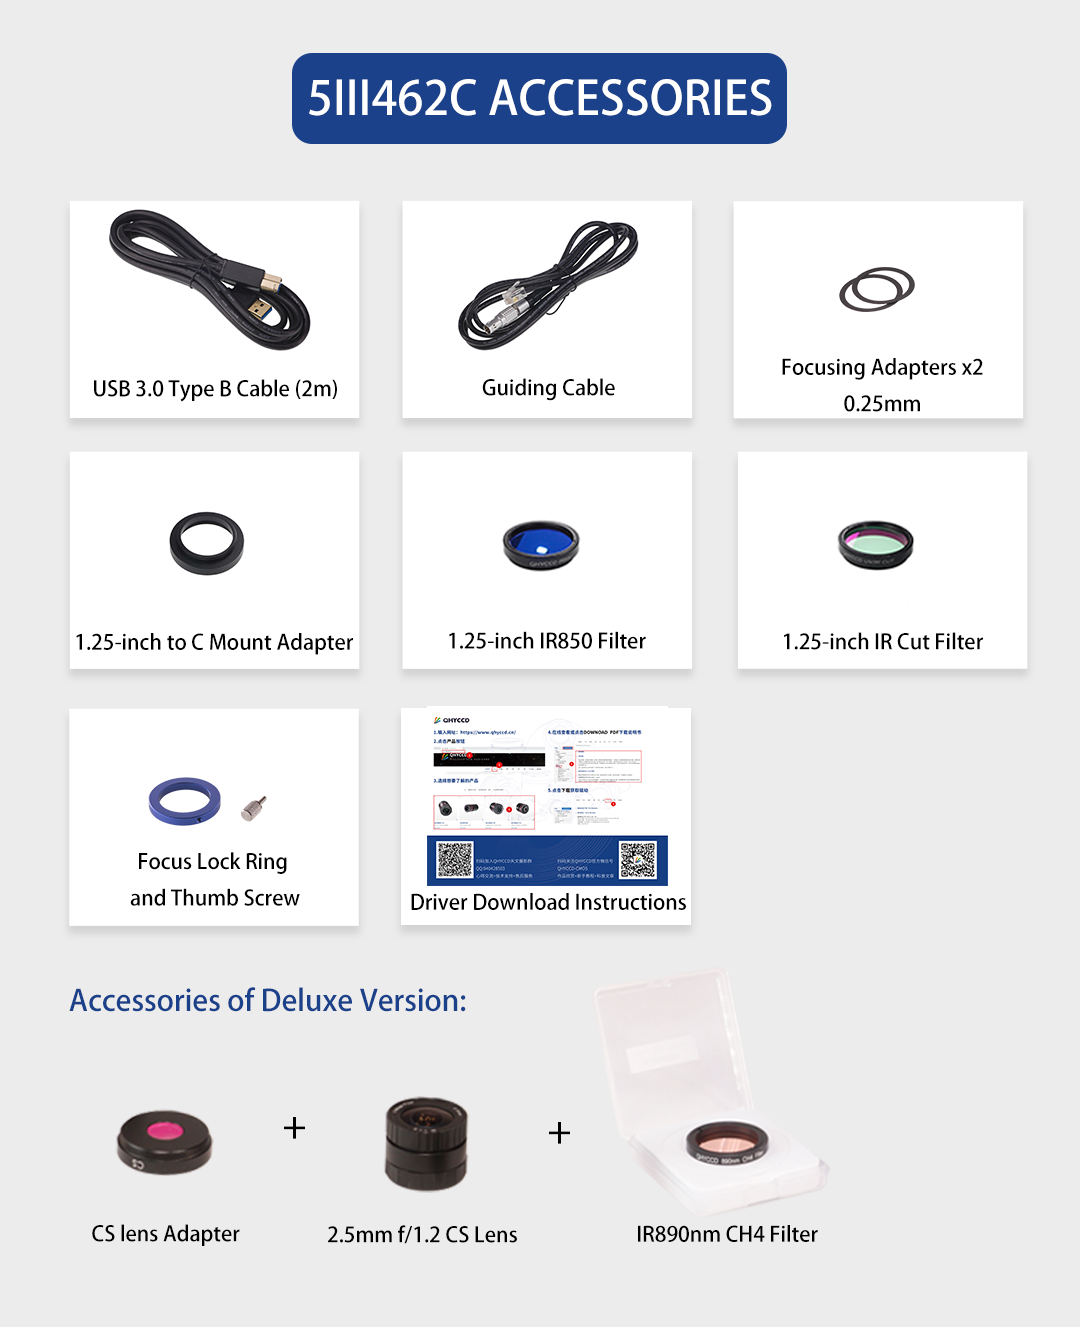
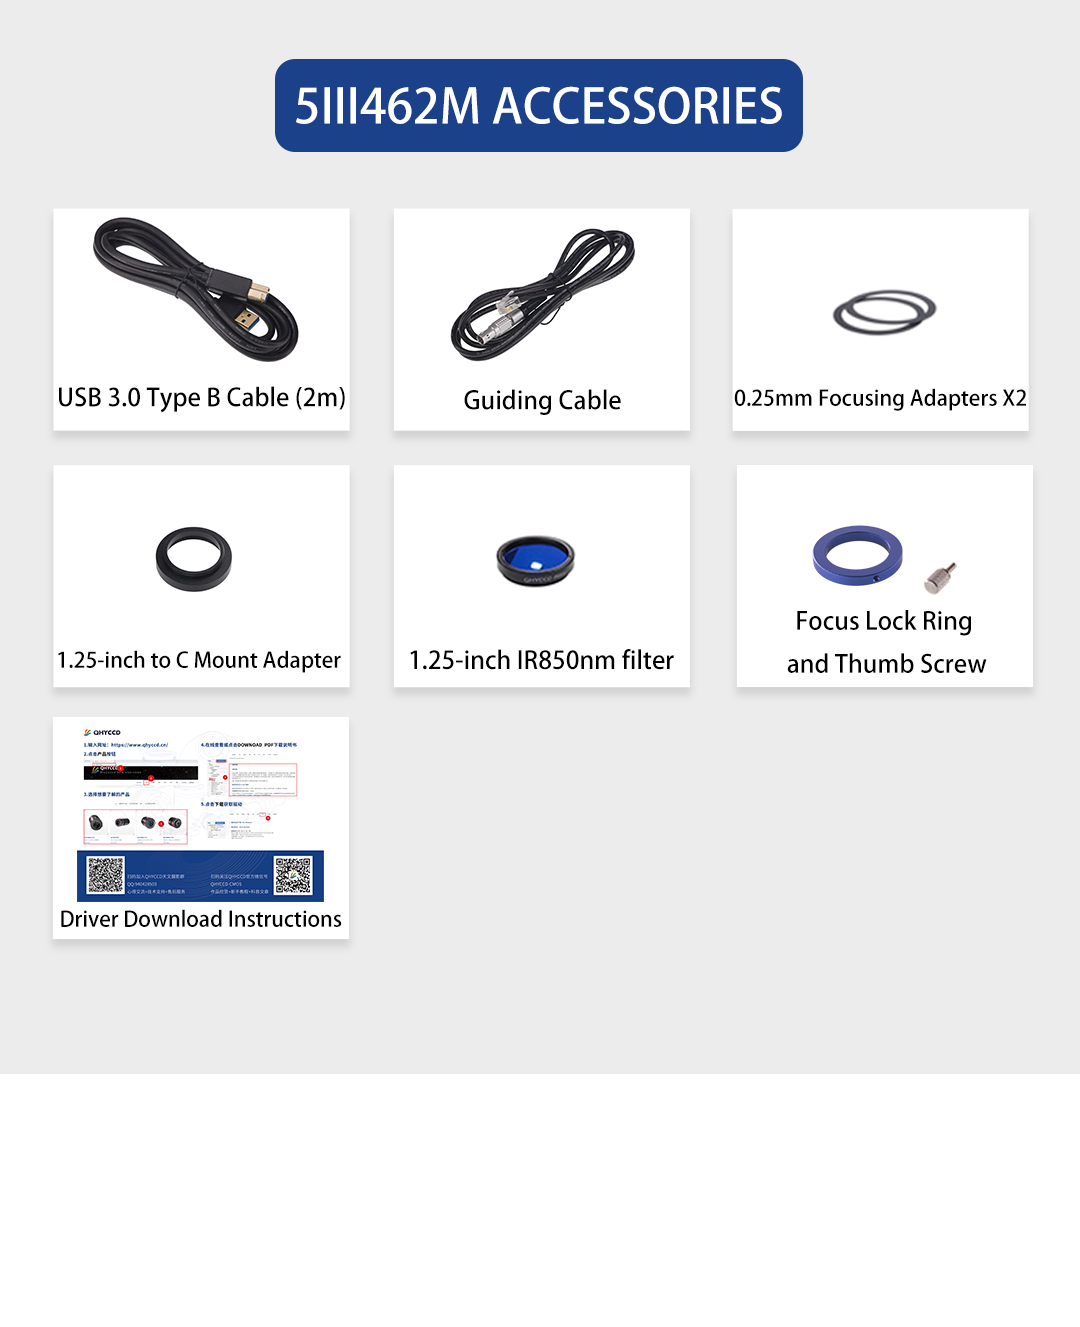
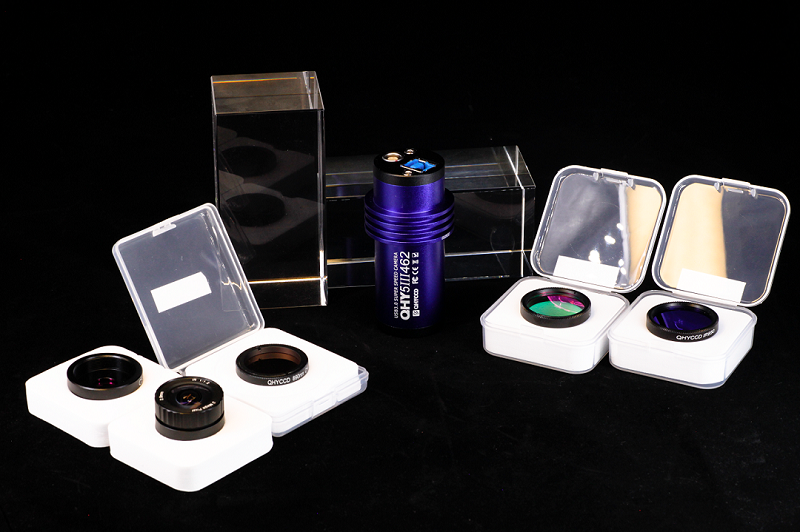
Many color cameras build this UV/IR filter into the camera or optical window for normal color imaging. However, in order to fully exploit the capabilities of the 462C sensor, in the QHY5III462C camera the optical window is AR coated only with no UV or IR blocking. Instead, the QHY5III462C camera includes two 1.25″ screw-in filters, a UV/IR cut filter to isolate the visible wavelengths for normal RGB imaging and an IR850 filter that will cut the visible wavelengths but pass wavelengths above 850nm.

| Model | QHY5III462M/C |
| CMOS Sensor | SONY IMX462 BSI CMOS |
| Pixel Size | 2.9um x 2.9um |
| Effective Pixel Area | 1920 x 1080 |
| Effective Pixels | 2 MP |
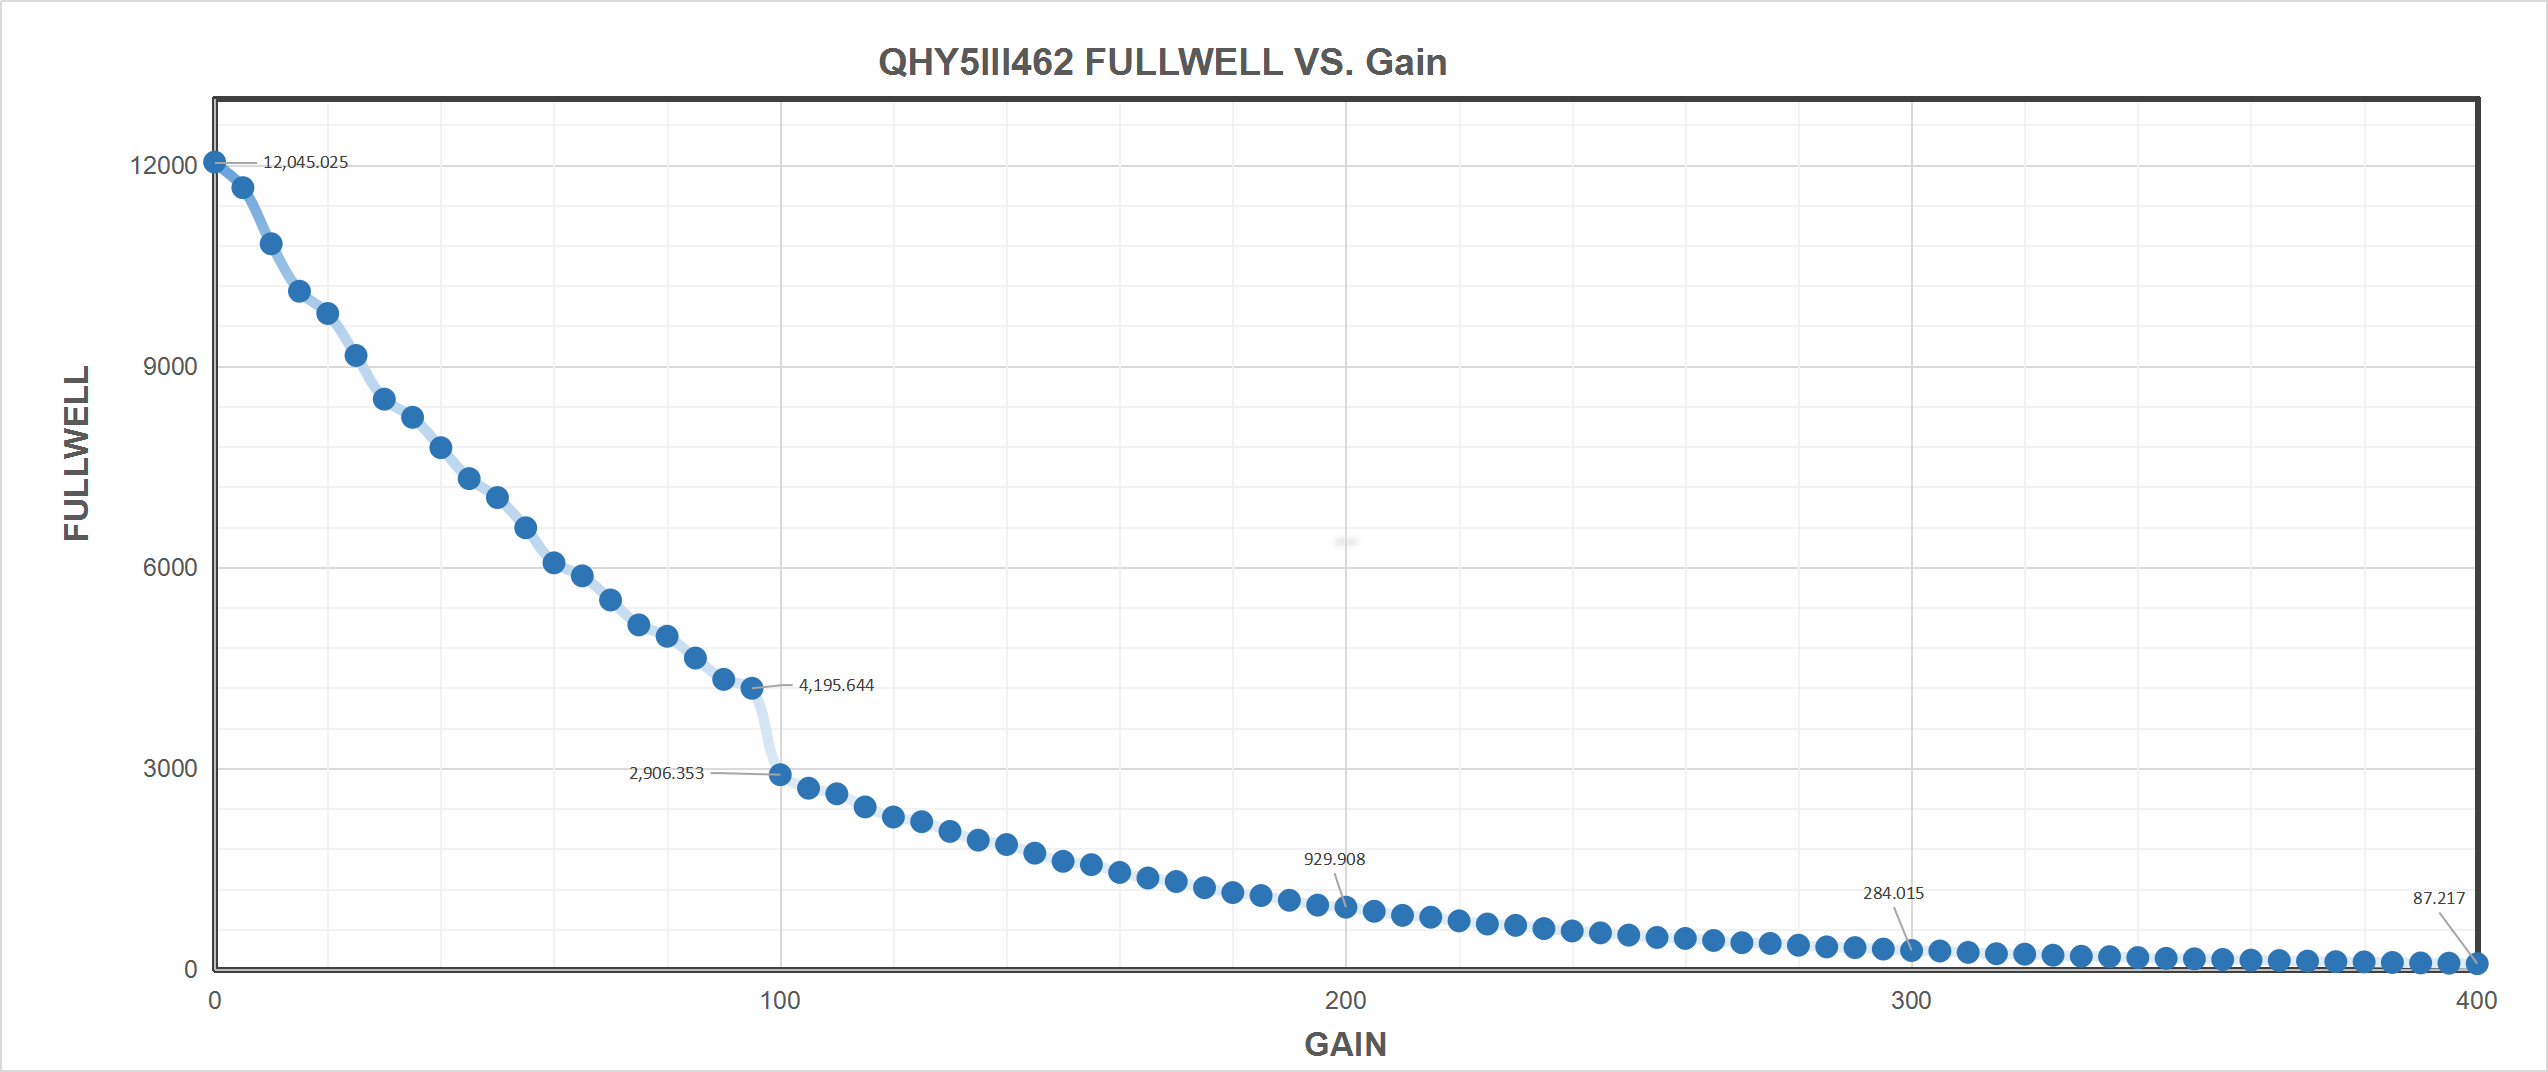
| Fullwell | 12000e- |
| Readout Noise | 0.5e- |
| AD Sample Depth | 12-bit (output as 16-bit and 8-bit) |
| Sensor Size | Typical 1/2.8 inch |
| Full Frame Rate | Full Resolution 135 FPS@8-bits (USB3.0 Port) |
| ROI Frame Rate | Higher rates at selected fields of interest (Supports any region ROI) |
| Exposure Time Range | 7us-900sec |
| Shutter Type | Electronic Rolling Shutter |
| Computer Interface | USB3.0 |
| Guide Port | Yes |
| Telescope Interface | 1.25-inch |
| Optic Window Type | Changeable 1.25-inch filter as optical window
(462C: Includes free 1.25-inch UV/IR cut filter and free 1.25-inch IR850 filter 462M: Includes a free 1.25-inch IR850 filter) |
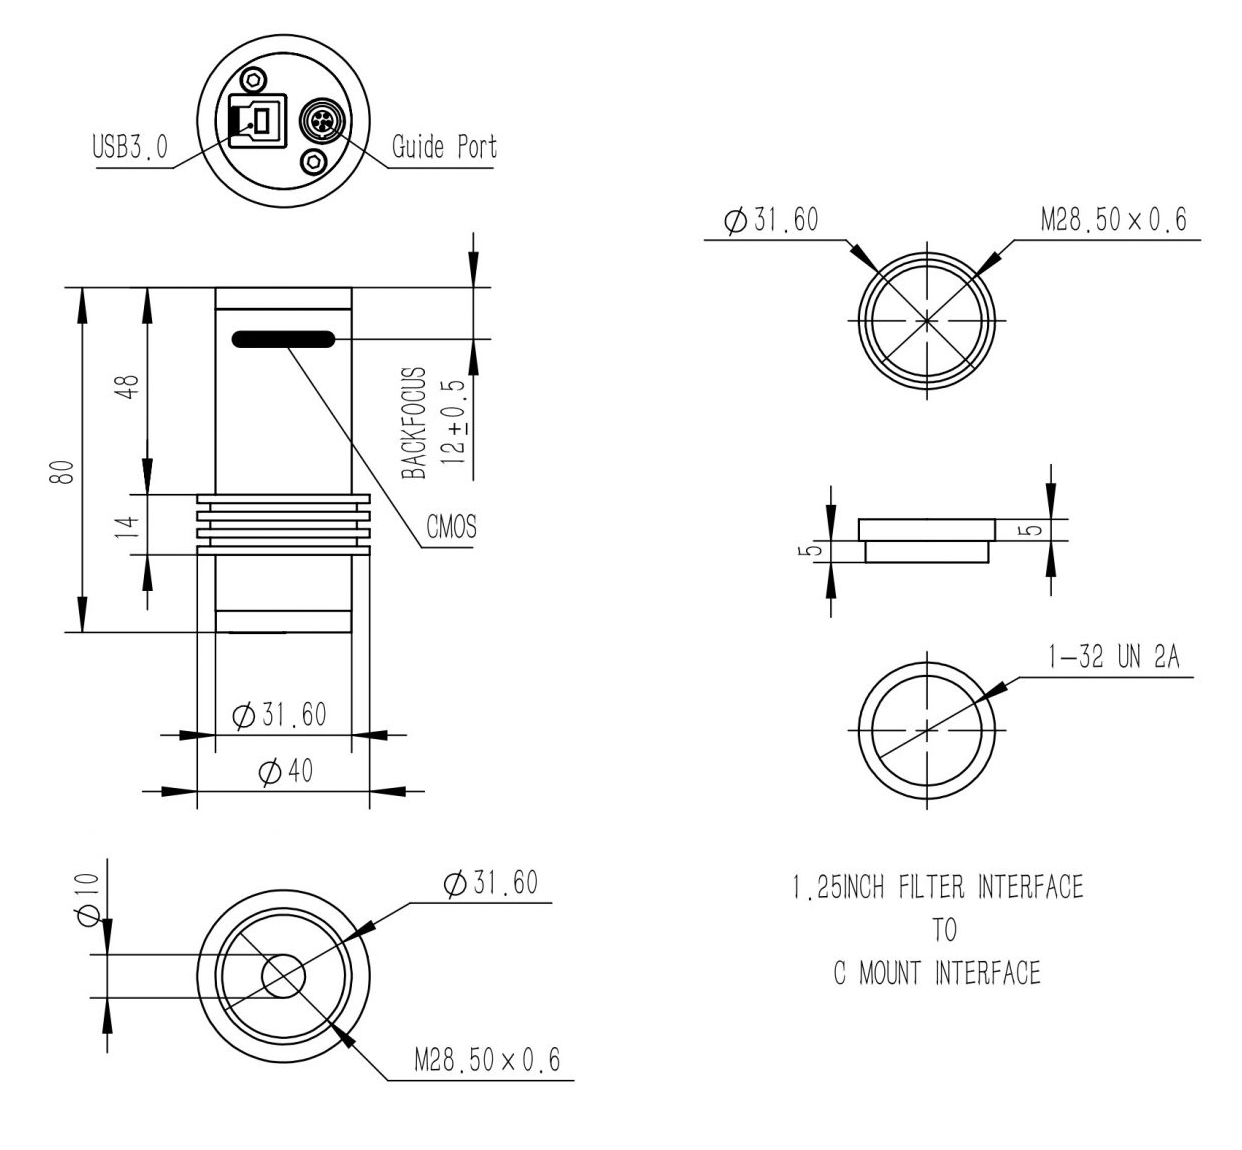
| Back Focal Length | 12mm (±0.5) |
| Weight | 88g |
| Reference Price |
The camera requires an input voltage between 11V and 13.8V. If the input voltage is too low the camera will stop functioning or it may reboot when the TEC power percent is high, causing a drain on the power. Therefore, please make sure the input voltage arrived to the camera is adequate. 12V is the best but please note that a 12V cable that is very long or a cable with small conductor wire may exhibit enough resistance to cause a voltage drop between the power supply and the camera. The formular is: V(drop) = I * R (cable). It is advised that a very long 12V power cable not be used. It is better to place the 12V AC adapter closer to the camera.
First connect the 12V power supply, then connect the camera to your computer via the USB3.0 cable. Make sure the camera is plugged in before connecting the camera to the computer, otherwise the camera will not be recognized. When you connect the camera for the first time, the system discovers the new device and looks for drivers for it. You can skip the online search step by clicking “Skip obtaining the driver software from Windows Update” and the computer will automatically find the driver locally and install it. If we take the 5IIISeries driver as an example (shown below), after the driver software is successfully installed, you will see QHY5IIISeries_IO in the device manager.
Please note that the input voltage cannot be lower than 11.5v, otherwise the device will be unable to work normally.
All-in-one Pack supports most QHYCCD models only except PoleMaster and several discontinued CCD cameras.
Download Page: https://www.qhyccd.com/download/
Video Tutorial: https://www.youtube.com/embed/mZDxIK0GZRc?start=1
- Since most of the contents of All-in-one package are plug-ins that support third-party software, the third-party capturing software that you want to use must be installed before the All-in-one package. Otherwise the program will report an error.
- ALL-IN-ONE Pack contains:
- System Driver, which is necessary for the camera operation and must be installed.
- WDM Broadcast Driver, which can provide a live signal to Obs and other live software, you can install it if you have such needs like opeing a live show.
- EZCAP_QT , which is developed by QHYCCD and can be used in QHY devices tests, and management of updates. So even if you won’t use EZCAP_QT for capturing, we suggest you install it.
- Ascom driver, which is necessary for the camera used in Ascom (the latest version of Ascom is 6.6).
- The two sorts of Ascom CFW Drivers correspond to two methods of controling the filter wheel: USB control and camera serial control. It is recommended that both drivers should be installed if you have a filter wheel.
- CP210X_VCP is a serial driver. Some computers come with the driver, but the computer without the driver may be failed of controling the filter wheel.
- SDKs for Third-party Software: Just pick and install the corresponding SDK according to the software you want to use. Don’t forget to check whether the software you are using is 32-bit or 64-bit and select the right SDKs.
- SHARPCAP is also included in the pack, you can choose 32-bit or 64-bit to install. This is authorized by SHARPCAP.
- QT LIB is a plug-in to ensure that 64-bit software can exeuate normally on some computers with poor compatibility.
- Difference between Stable version and Beta Version: Beta version is the latest version, which gives priority to support for the latest products (the stable version may not be compatible with those yet), and has some of the latest optimized ,but experimental features. The stable version is older than the beta version but more stable, so it is recommended for beginners who are not using the latest products.
- Don’t let the camera connect to the computer during the All-in-one pack installation process; connect it to the computer after all the installation is complete.
Here we mainly take QHY5III462C as example. This User Guide can be applied to all QHY5III series Camera.

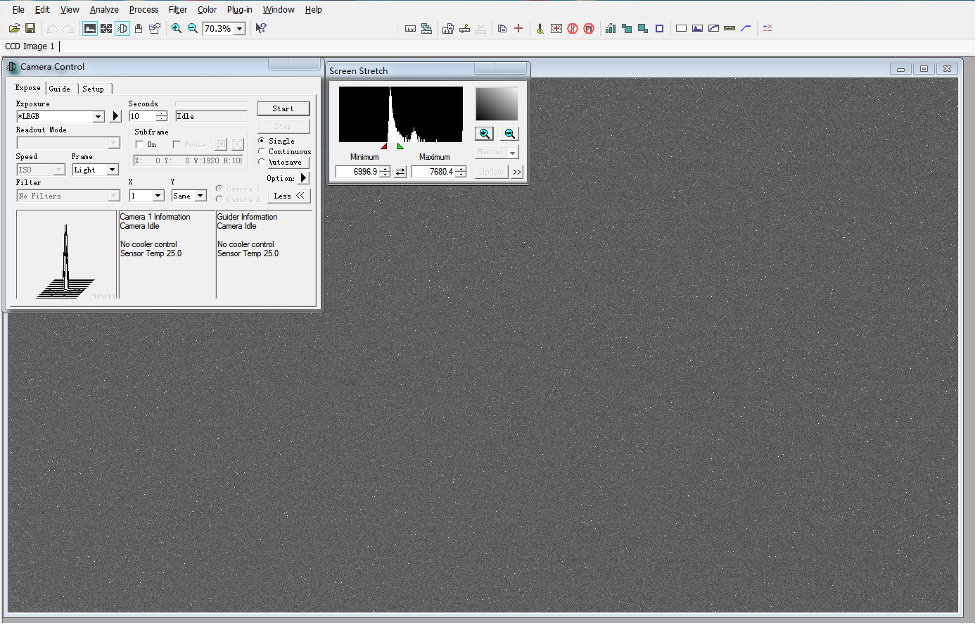
Adjust OFFSET. You will find that when the lens cover is closed and the image is completely black, the background of the image is still not completely black. Therefore, you need to adjust the OFFSET value to make the image darker. Generally speaking, for planetary shooting, setting the image background to very dark is not a big problem. For deep space shooting, a certain background should be retained, and it should not be completely black, otherwise it will lead to the loss of a weak background cloud.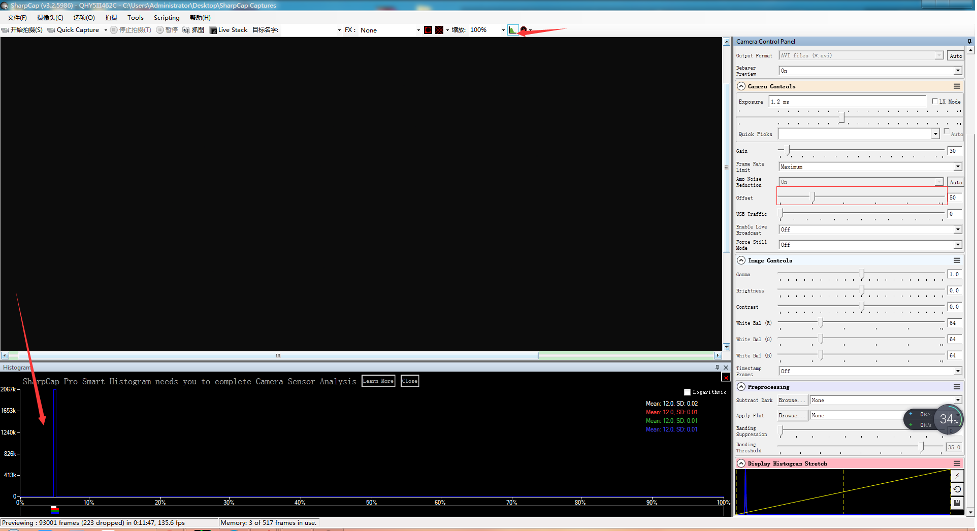
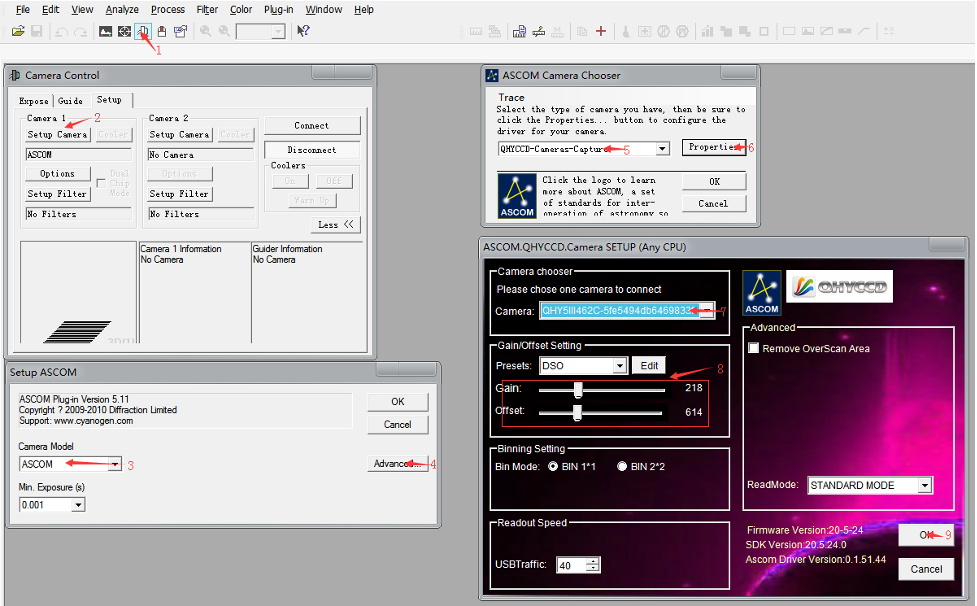
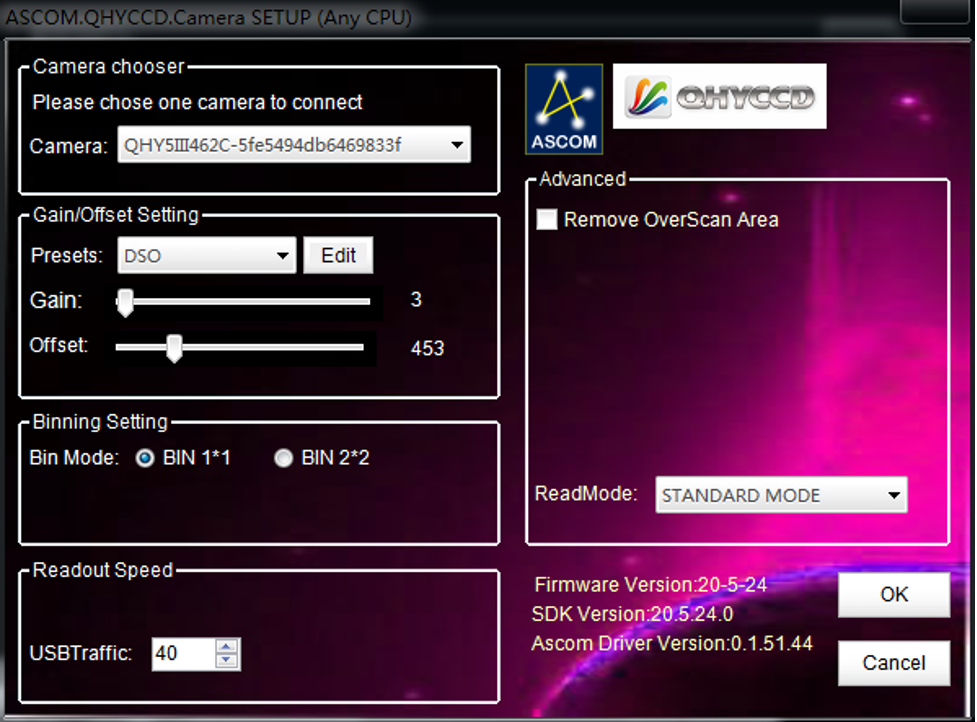
There are many astronomical software support ASCOM, you can connect QHY5III462C through ASCOM. Note that currently QHY5III462C only supports the ordinary ASCOM shooting mode, and does not yet support the ASCOM video mode. In order to obtain the maximum dynamic range and effect, the ASCOM driver uses the maximum number of digits transmission by default (for QHY5III462C, 12-bit), the image is stored in a 16-bit format, and the lower bits are filled with zeros.
Use MAXIMDL for Plantery Imaging
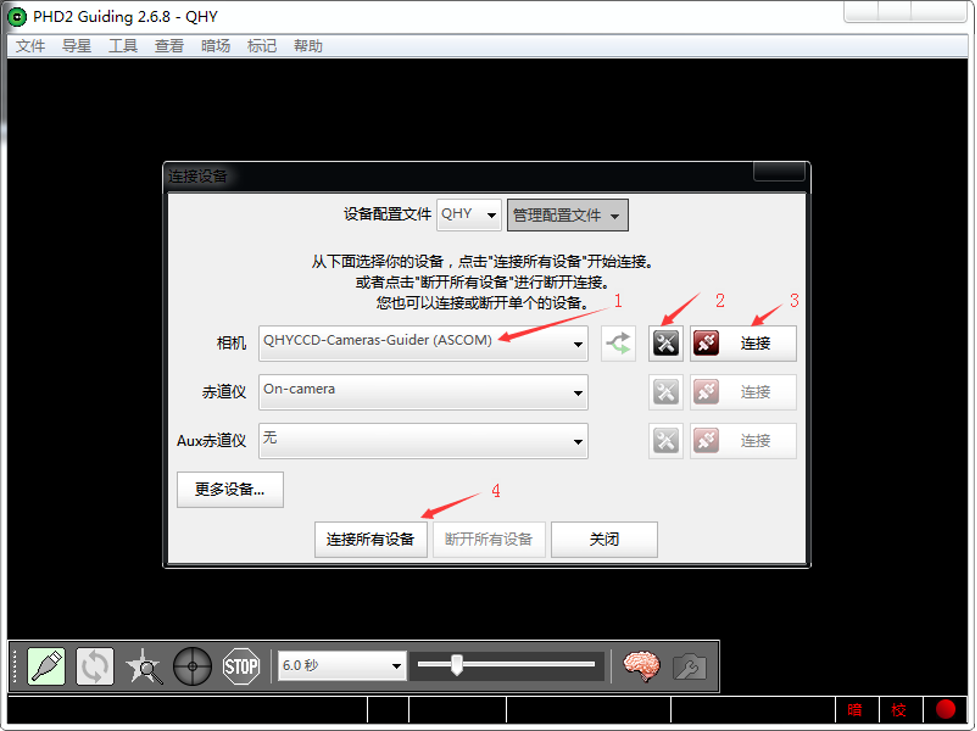
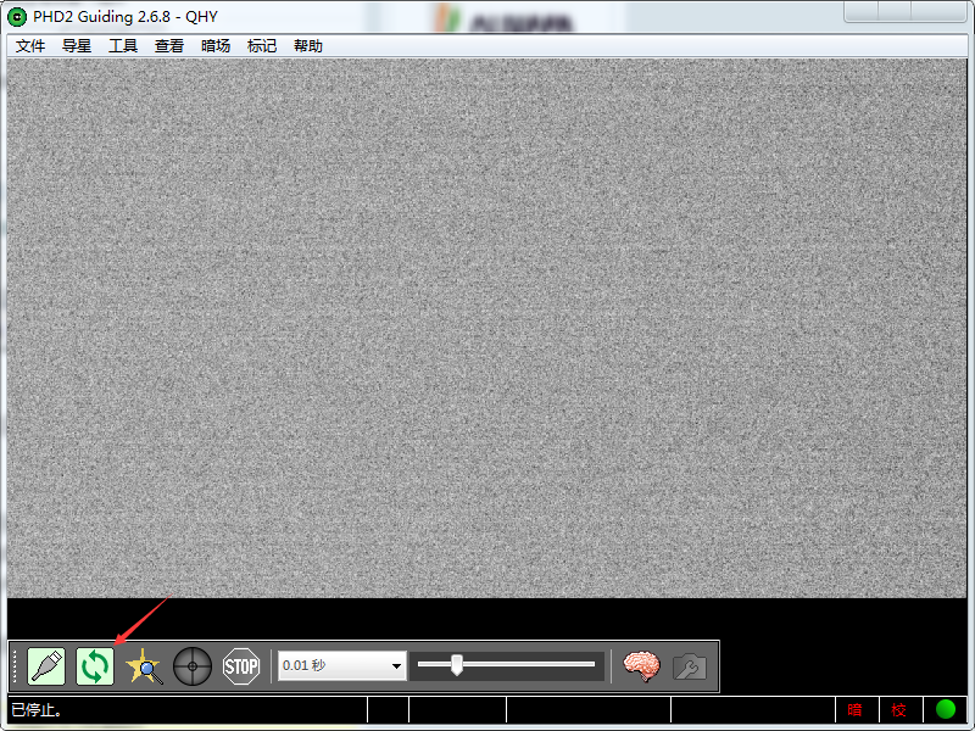
Using PHD for Guiding
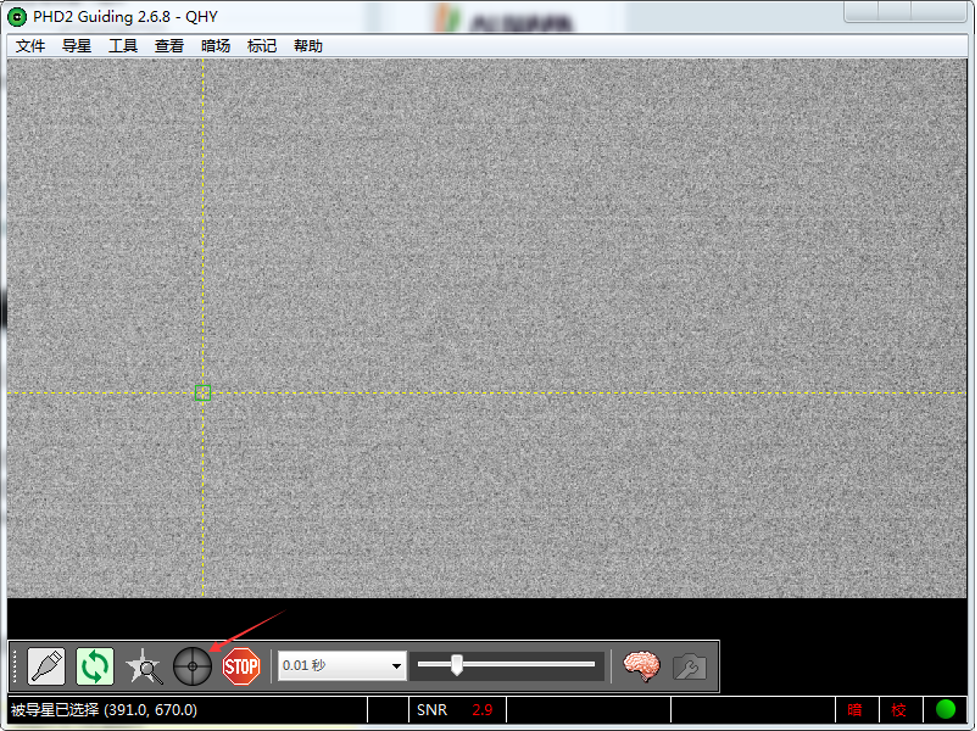
Select a star point on the screen, a green frame appears, and then select to start calibrating the equatorial mount and guide star.
QHYCCD BroadCast WDM Camera is a broadcast driver that supports QHYCCD cameras with video broadcast function, which can meet the needs of customers to send video images to other target software. For example, use sharpcap to connect a WDM-enabled camera, and the sharpcap display video image can be sent to other WDM-supported software for display, which is suitable for video online broadcast applications.
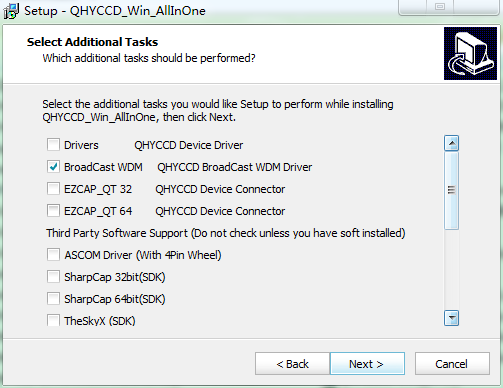
The installation process is over, right-click the computer to find the device manager, and check that the image device name is QHYCCD BroadCast WDM Camera, which means the installation is successful.
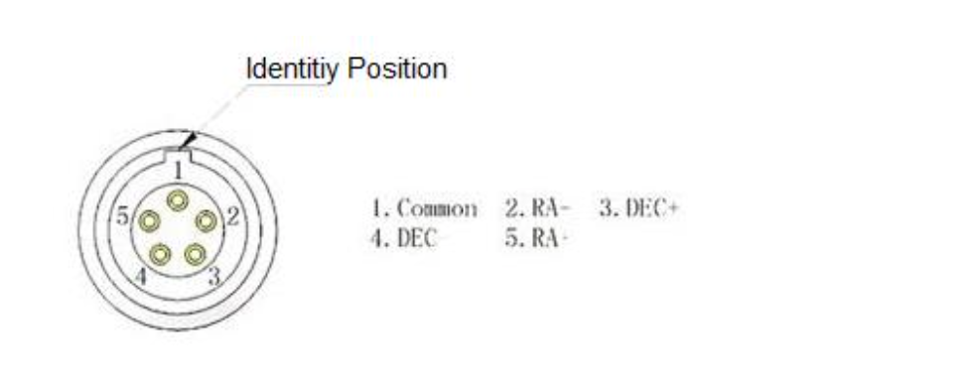
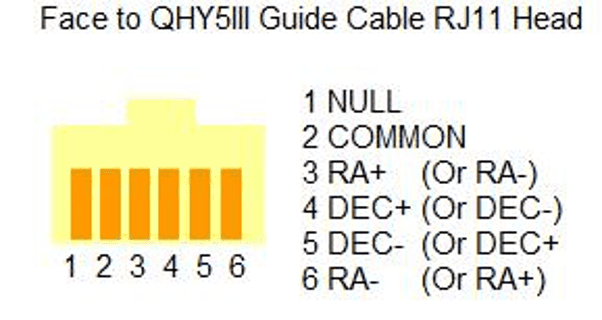
QHY5III Guiding Line Sequence Definition
The guide circuit contains an optocoupler isolator. The COMMON pin is generally connected to GND. Usually the four direction pins from the equatorial mount are internally pulled up on the equatorial mount circuit, so when the QHY5III sends out the guide star pulse, the optocoupler pulls it down to realize the output of the guide star command.
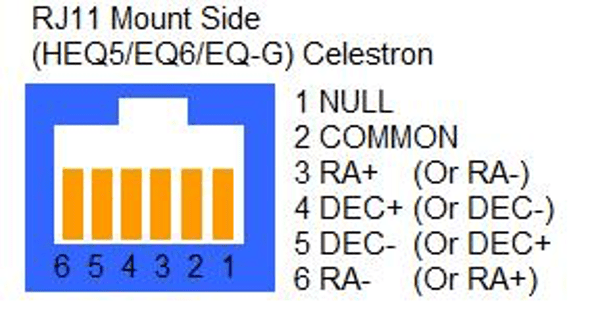
The line sequence of the socket at the equatorial mount is
If you use other types of equatorial mounts, please confirm whether the wire sequence is the same as the above.
Because QHY5III series cameras have a very high frame rate and data volume, not all computers can reach the maximum frame rate. Generally I7 quad-core is no problem. However, the CPU occupancy rate will also affect the maximum frame rate, so when using QHY5III, try to close other programs that occupy the CPU and free up the CPU to process the data. If the CPU usage is too high, the program will respond slowly or even crash.
| Cooled CMOS Camera | Bayer |
| QHY600C | RGGB |
| QHY268C | RGGB |
| QHY410C | RGGB |
| QHY533C | GBRG |
| QHY367Pro | RGGB |
| QHY128Pro | RGGB |
| QHY294C | RGGB |
| QHY247C | RGGB |
| QHY168C | RGGB |
| QHY165C | RGGB |
| QHY163C | GRBG |
| QHY183C | RGGB |
| QHY174C | RGGB |
| QHY178C | GBRG |
| QHY290C | GBRG |
| QHY224C | GBRG |
| Planetary and Guiding | Bayer |
| QHY5III174C | RGGB |
| QHY5III178C | GBRG |
| QHY5III224C | GBRG |
| QHY5III290C | GBRG |
| QHY5III462C | GBRG |
| QHY5III485C | RGGB |
| QHY5L-II-C | BGGR |
| QHY5P-II-C | GBRG |
| Cooled CCD Camera | Bayer |
| QHY8L-C | GBRG |
| QHY10-C | RGGB |
| QHY12-C | BGGR |
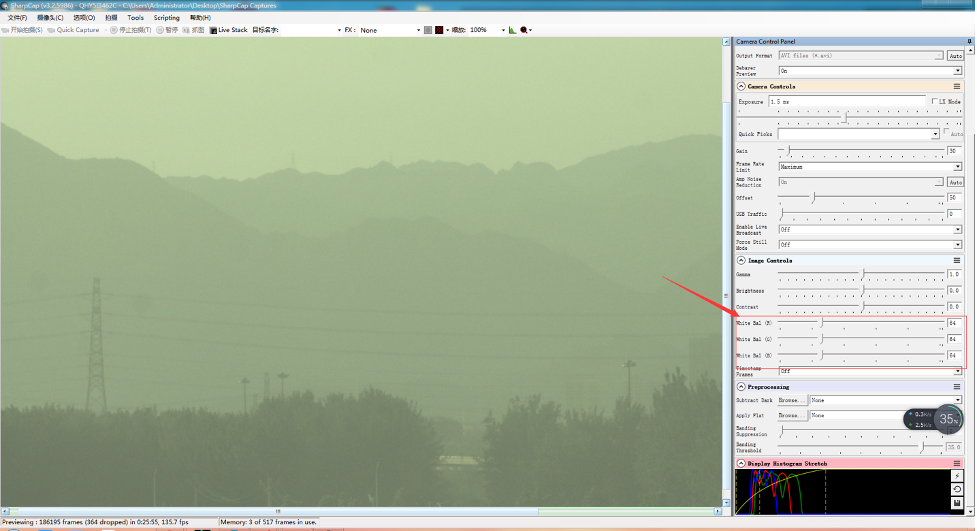
Now the ratio R”:G”=(R+bias)/(2R+bias) and it is not equ to 1:2. It shows the bias will effect the true value of the R:G. And the ratio of R:G will arious when the image light changed. It is hardly to correct with a fixed ratio.

